The Legend of Zelda: Tears of the Kingdom’s shrines dot the landscape of Hyrule as well as the Sky Islands, meaning there are loads to find. Sure, they may glow on the horizon, but not all are that easy to find. So, we’re here to help you find as many TotK shrines as possible. Just check out the maps below and you’re good to go.
We’ve also got Zelda: Tears of the Kingdom armor locations if any enemies you find in there are too tough, or a Zelda: Tears of the Kingdom Misko’s treasure guide if you’re looking for a new outfit. Or, if you want a big deep dive, check out our Zelda: Tears of the Kingdom review for even more.
Anyway, here are the different region maps showing the Zelda: Tears of the Kingdom shrine locations:
- Hyrule Field
- Hebra/Tabantha
- Gerudo region
- Eldin/Lanayru
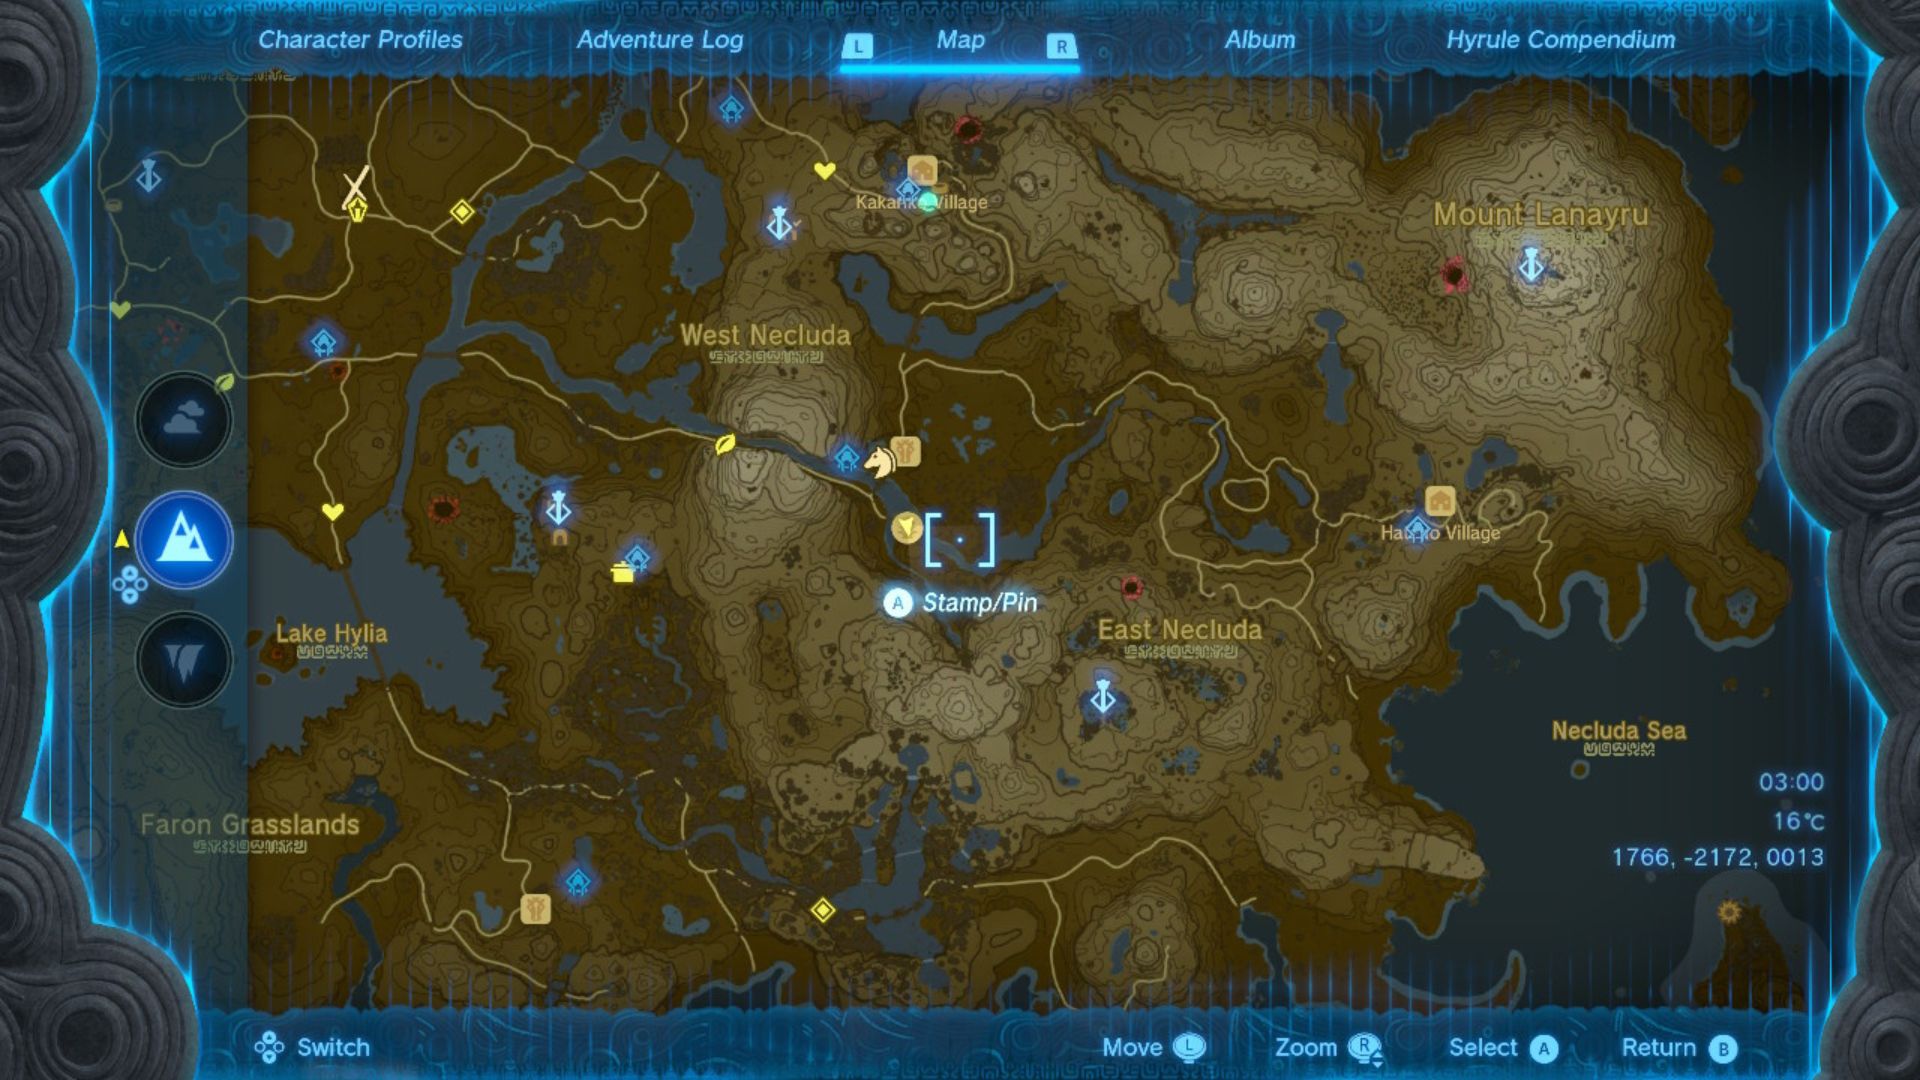
- Necluda
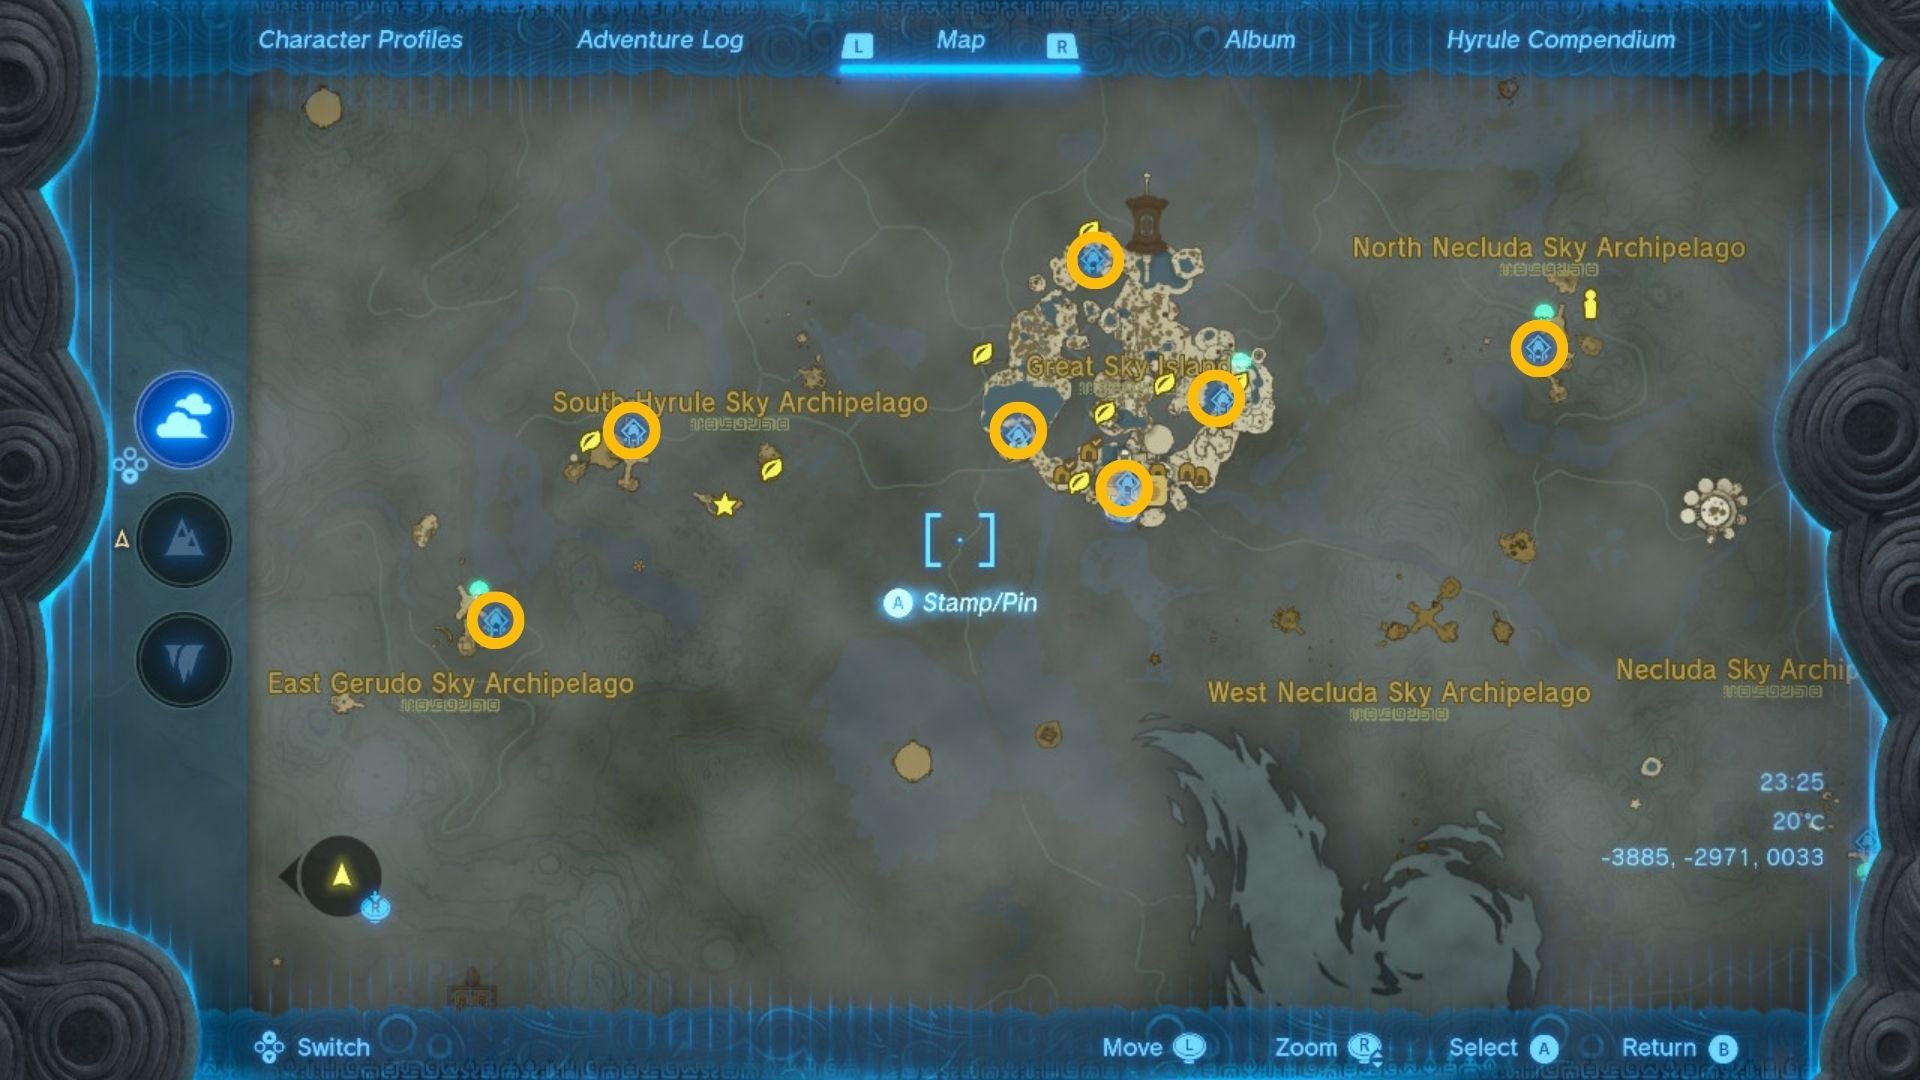
- Central sky
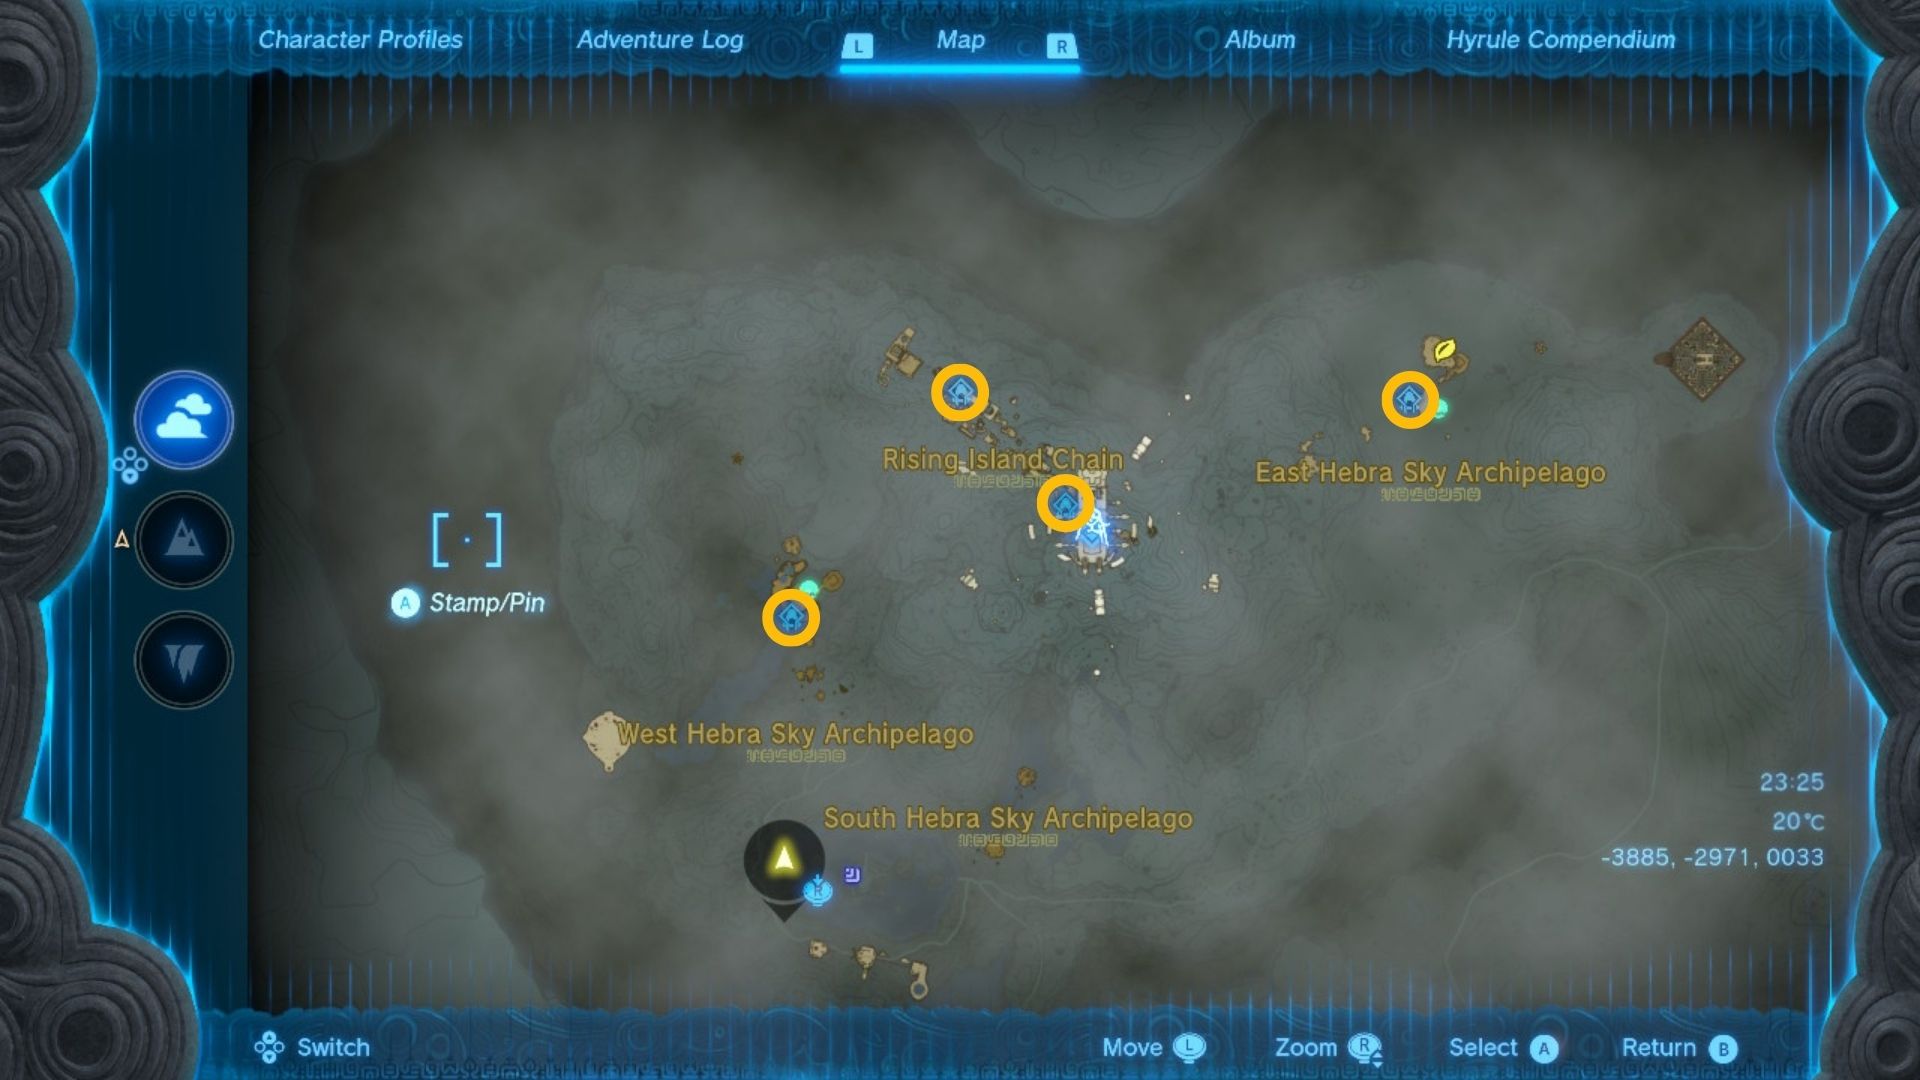
- Hebra sky
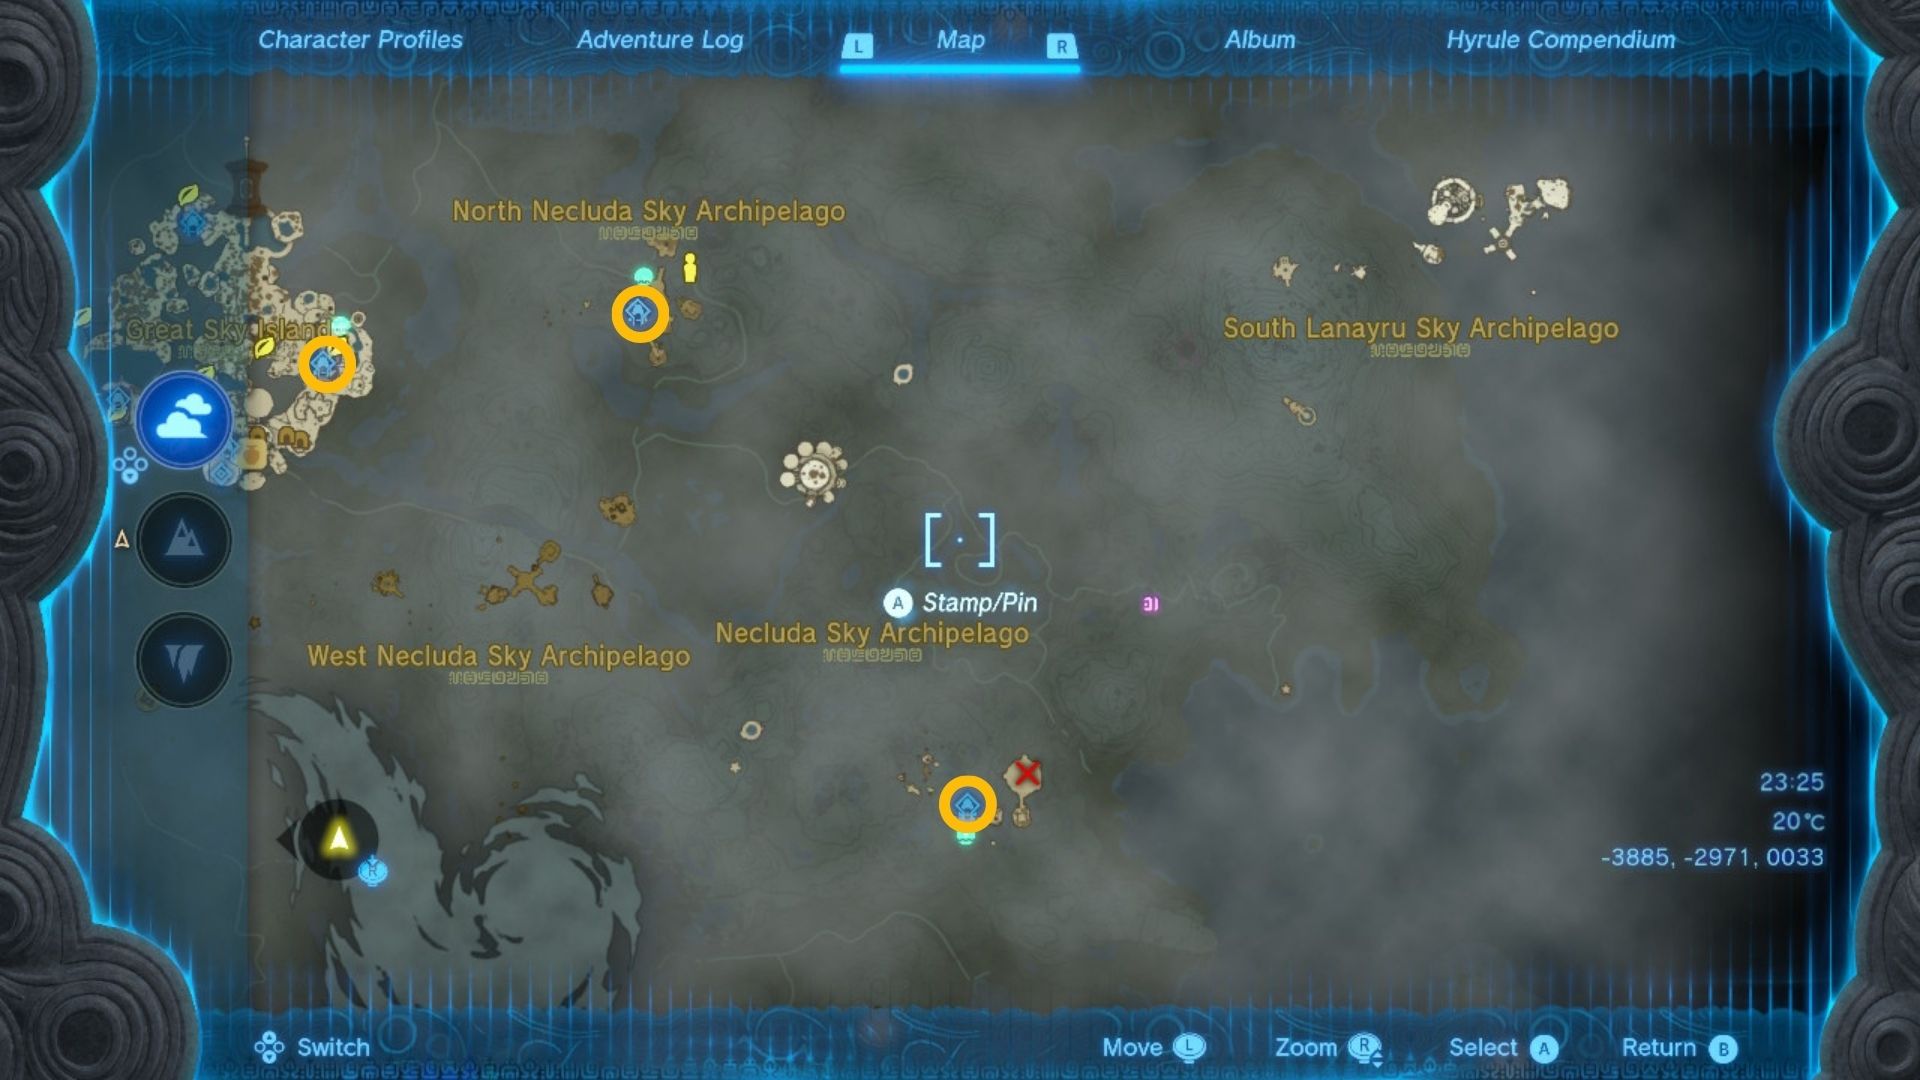
- Eldin/Lanayru sky
- Necluda sky
We’ve also got guides to some of the hardest TotK shrines down below for even more assistance:
Surface Shrines
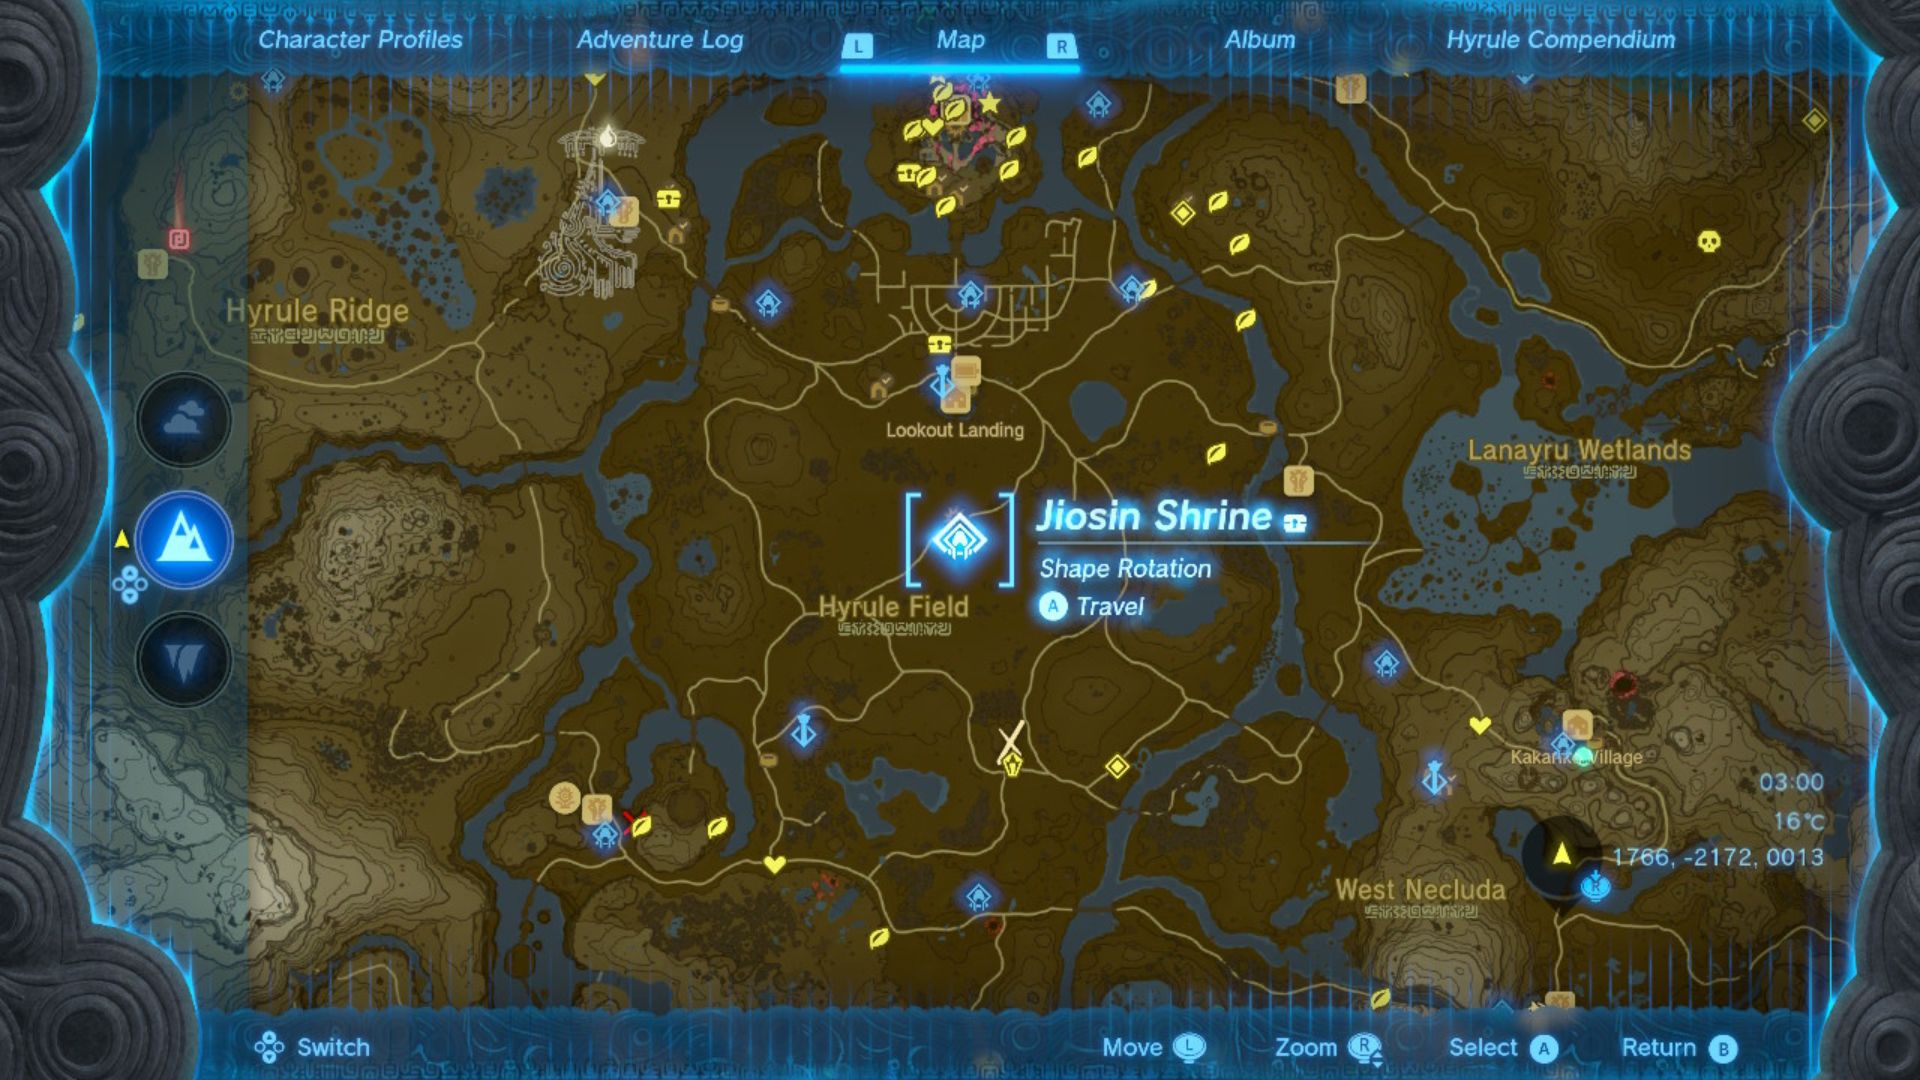
Zelda: Tears of the Kingdom Hyrule Field shrines
You can see all the Zelda: Tears of the Kingdom shrines we’ve found so far in Hyrule Field in the photo above.
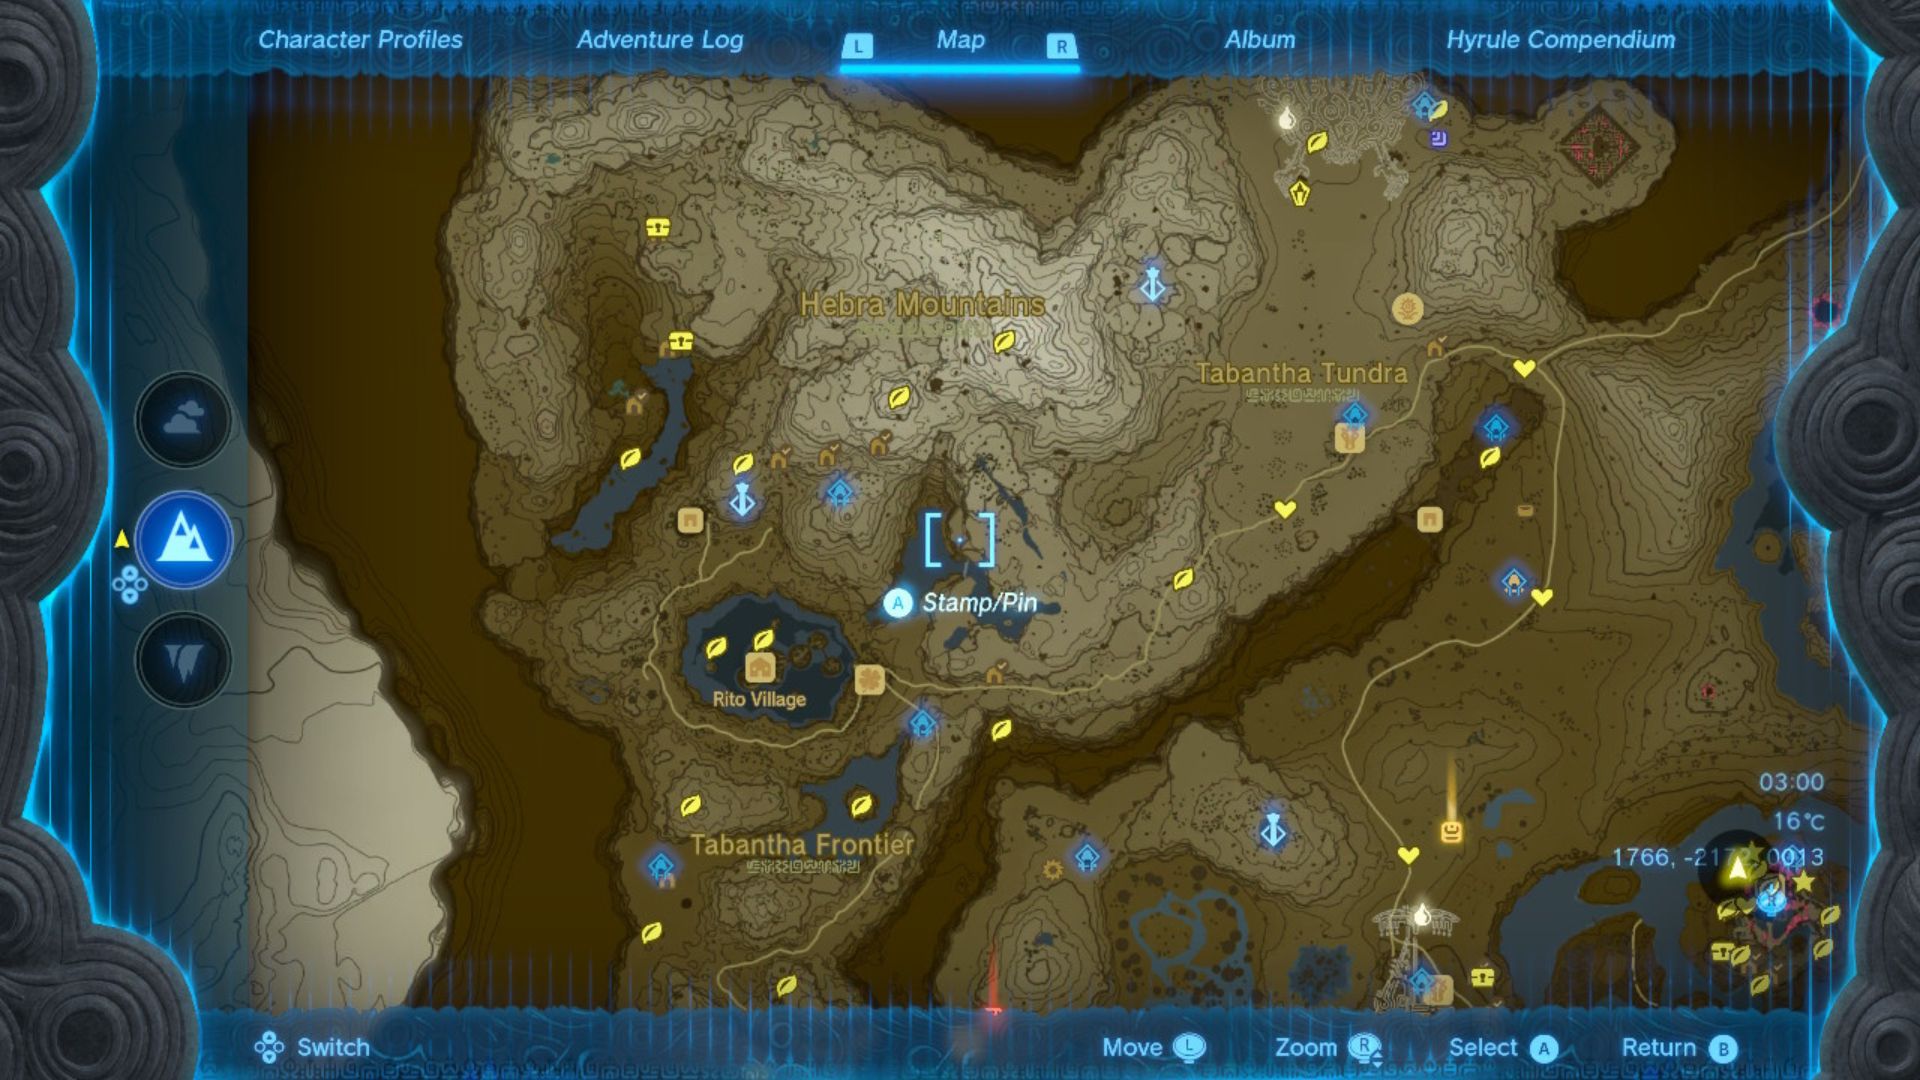
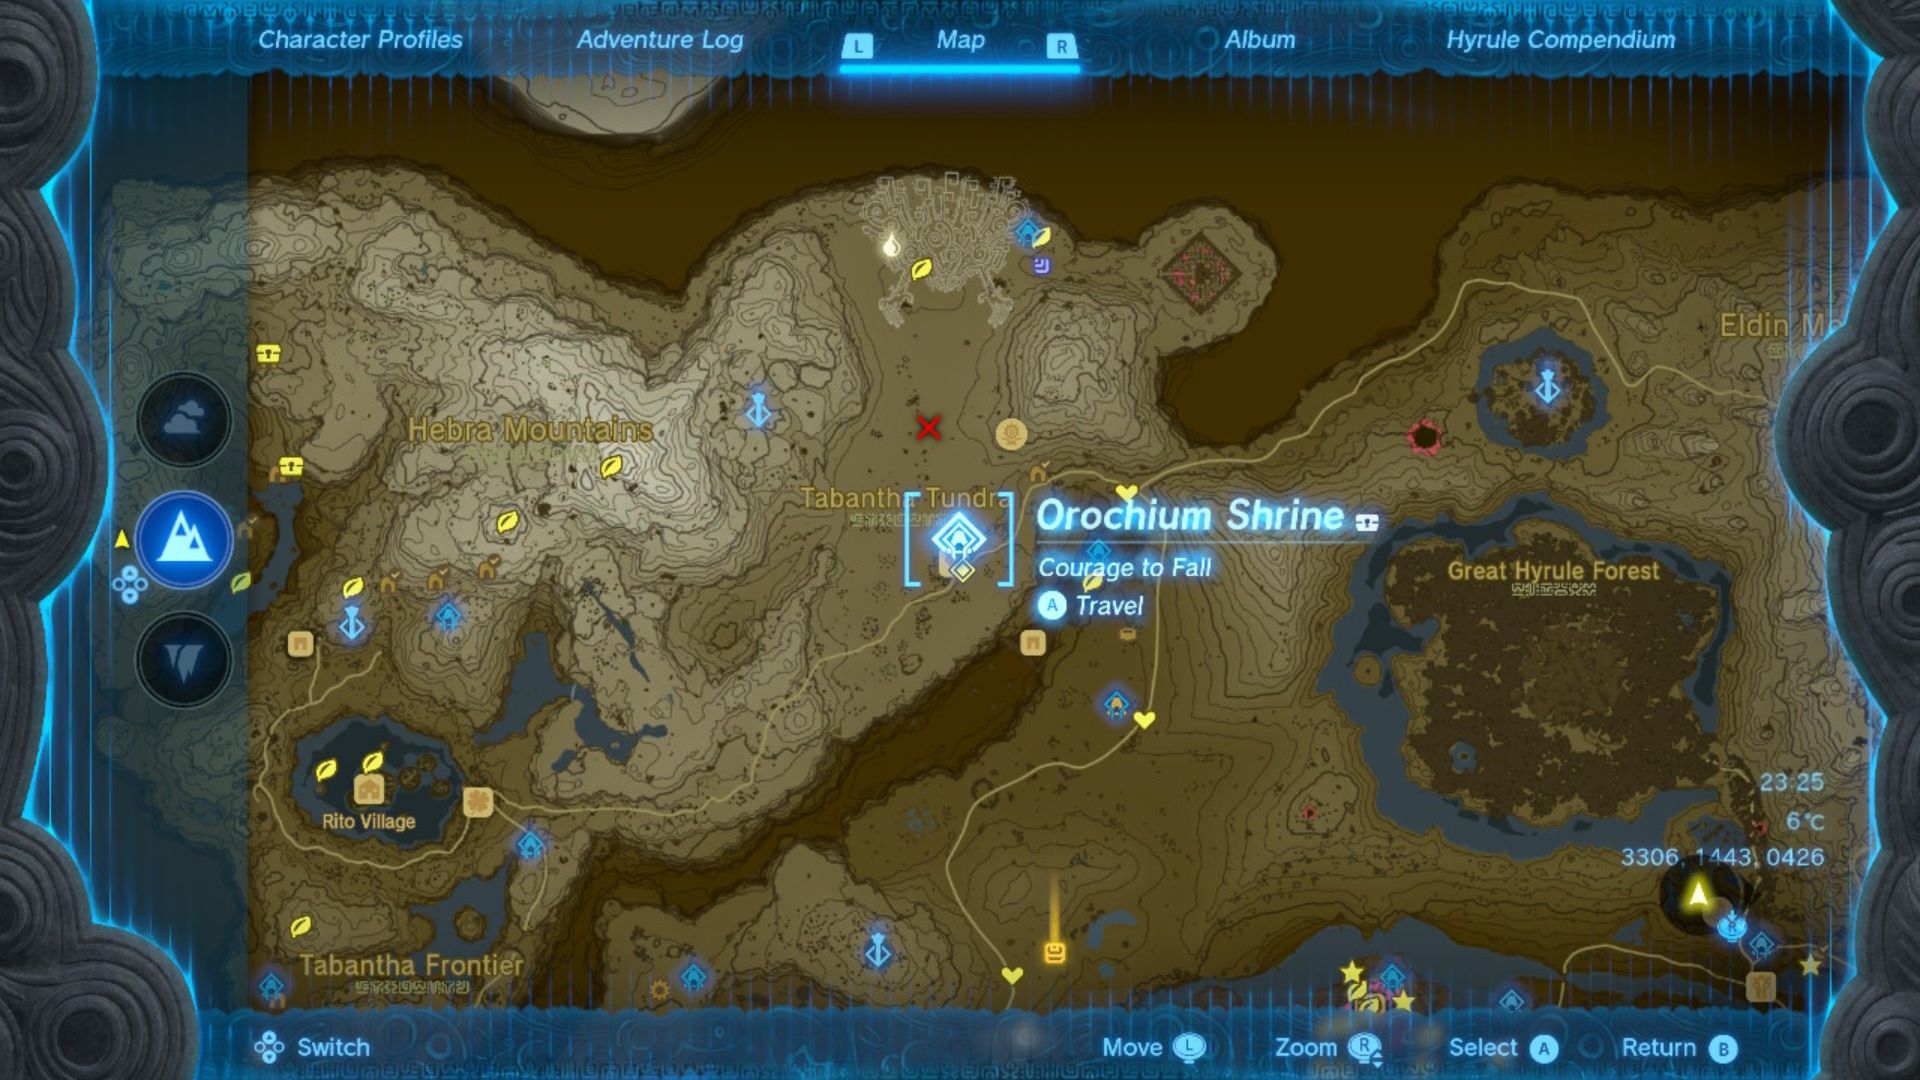
Zelda: Tears of the Kingdom Hebra/Tabantha shrines
You can see all the Zelda: Tears of the Kingdom shrines we’ve found in the Hebra and Tabantha regions in the photo above.
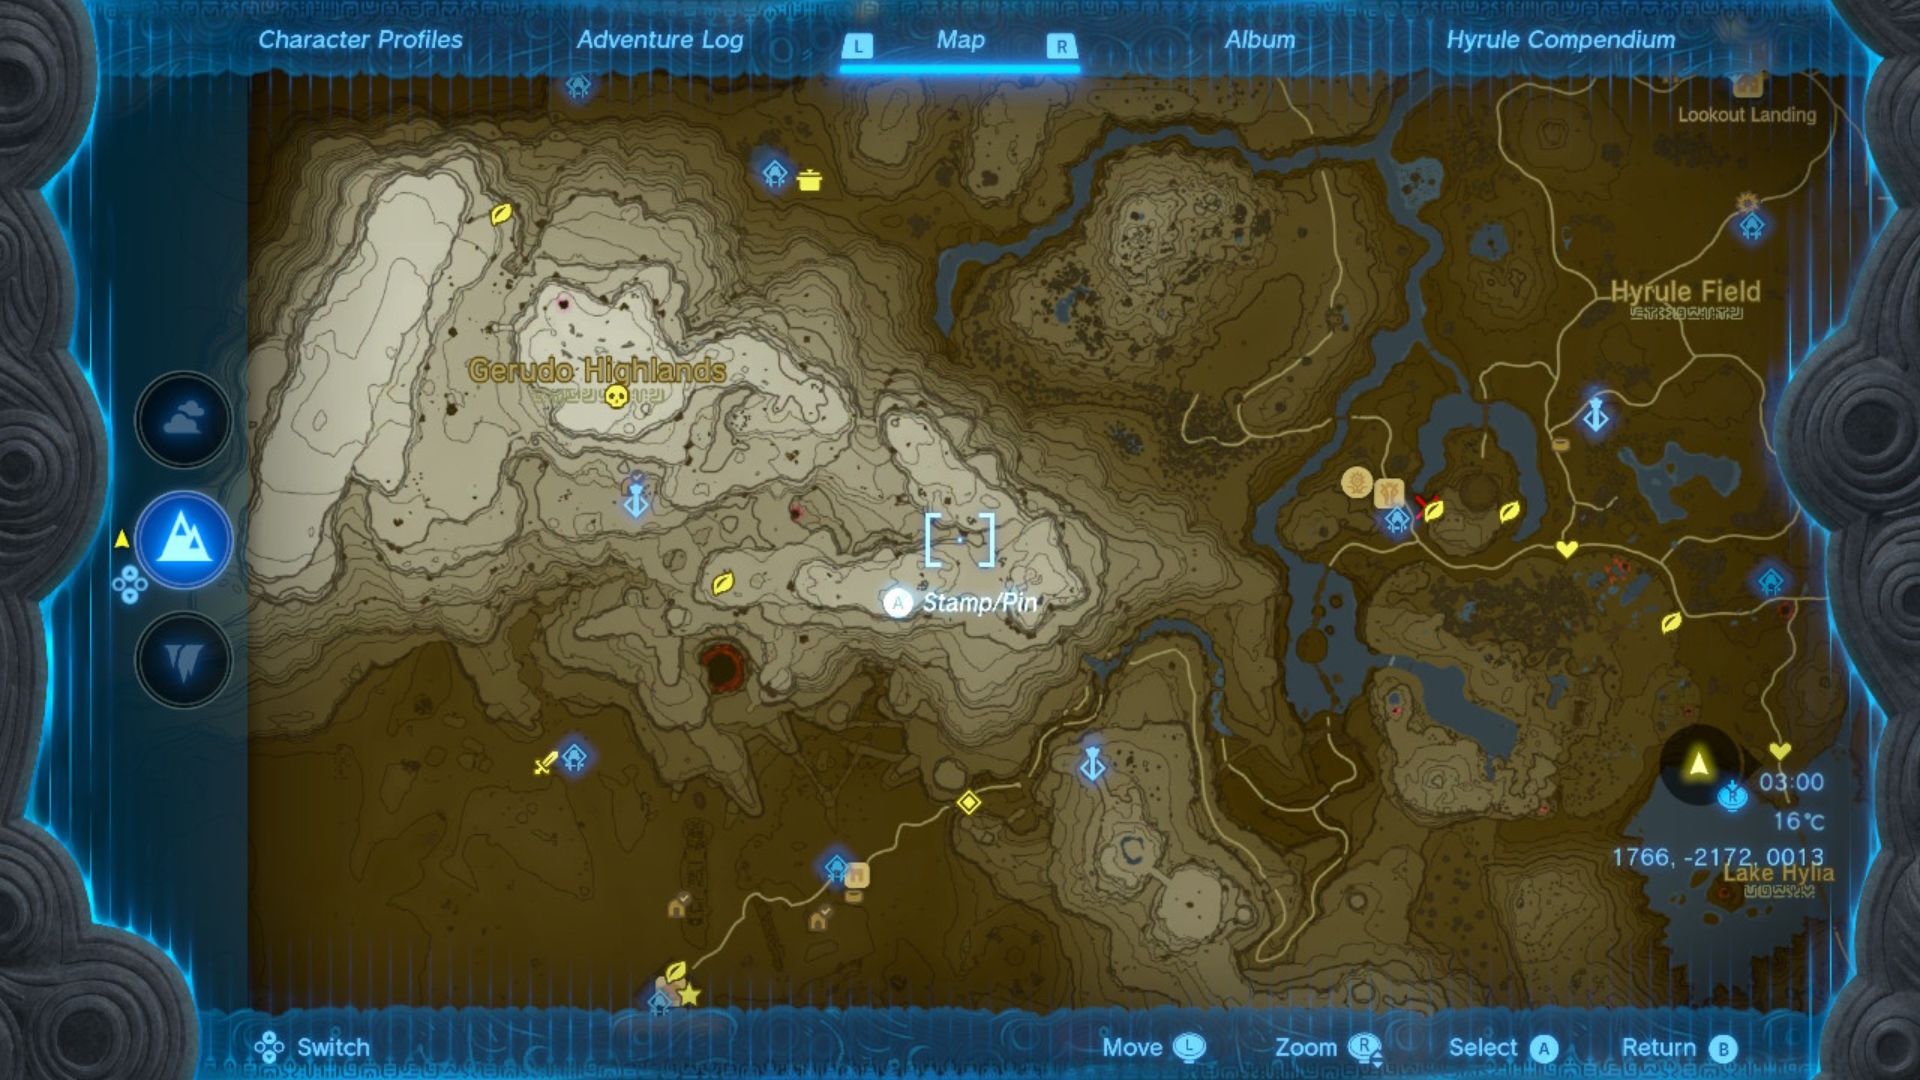
Zelda: Tears of the Kingdom Gerudo shrines
You can see all the Zelda: Tears of the Kingdom shrines we’ve found so far in the Gerudo region in the photo above.
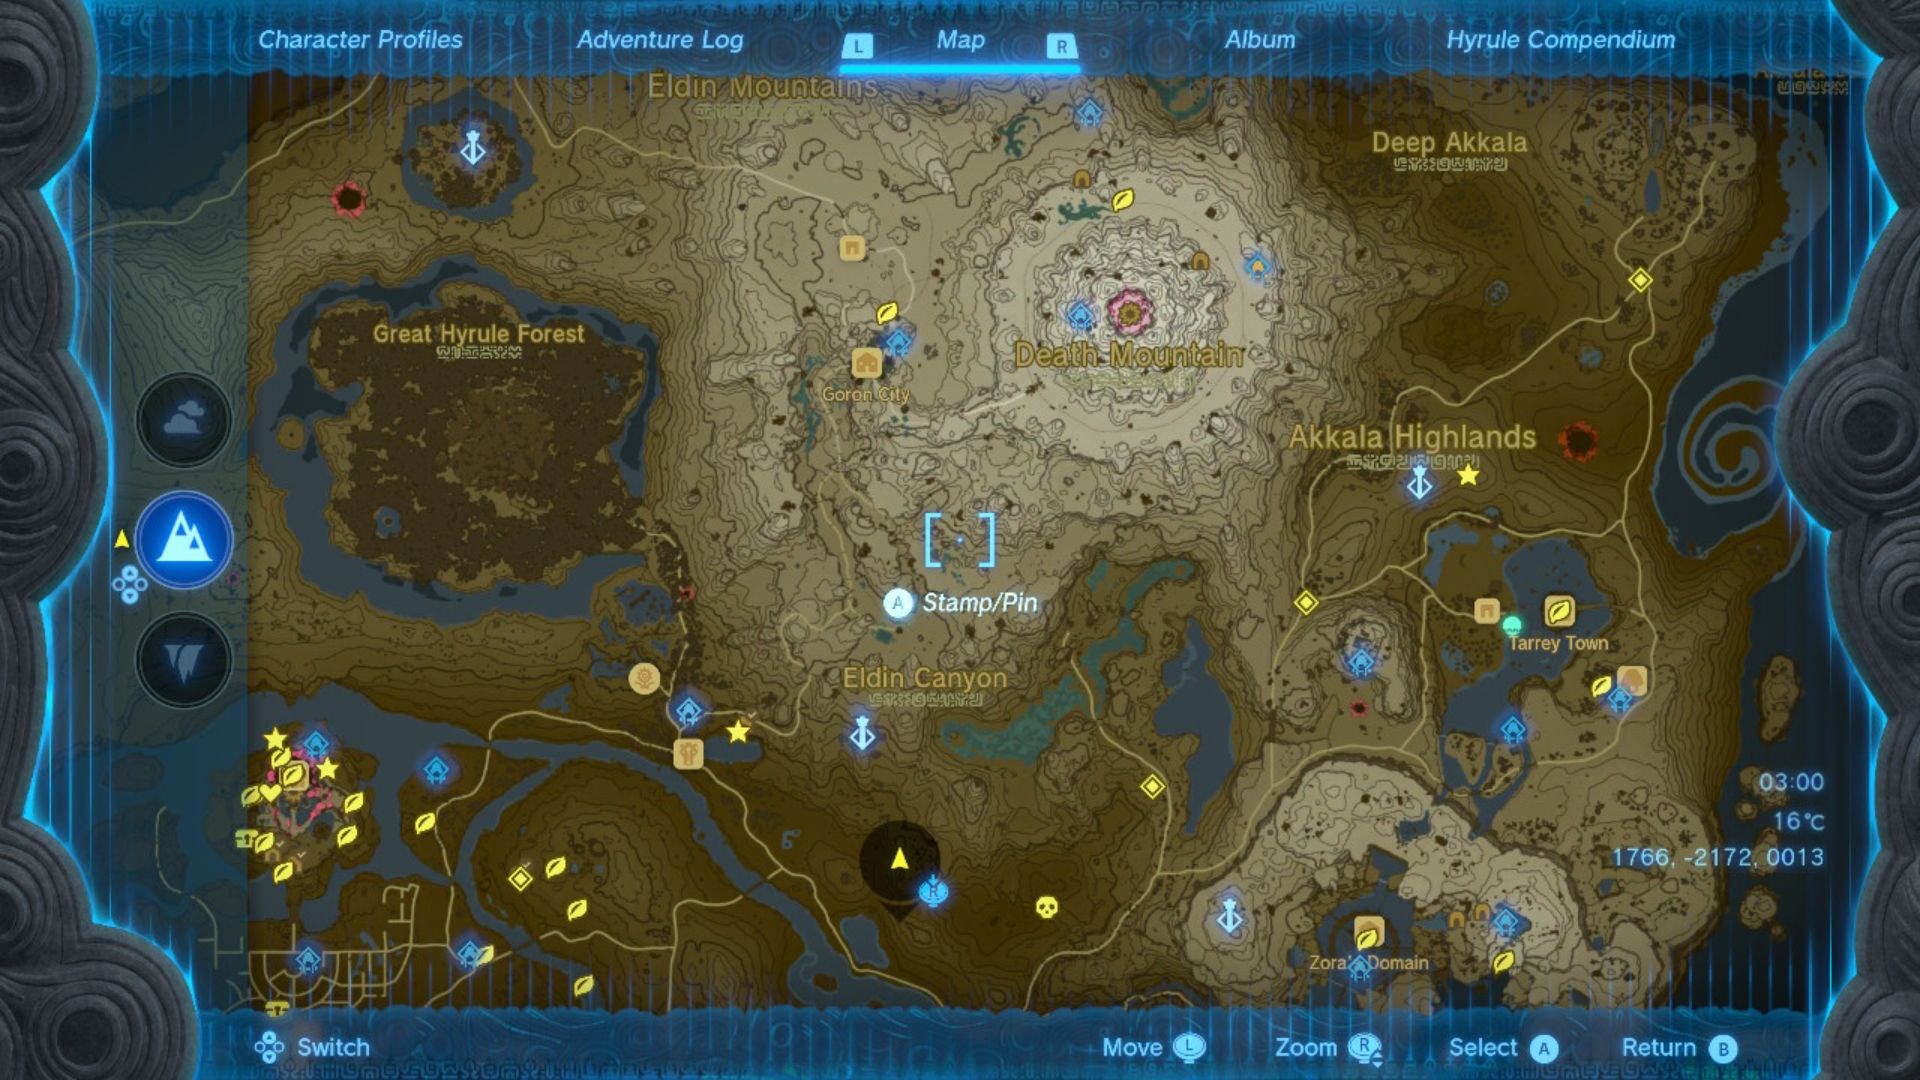
Zelda: Tears of the Kingdom Eldin/Lanayru shrines
You can see all the Zelda: Tears of the Kingdom shrines we’ve found so far in the Eldin/Lanayru region in the photo above.
Zelda: Tears of the Kingdom Necluda shrines
You can see all the Zelda: Tears of the Kingdom shrines we’ve found so far in the Necluda region in the photo above.
Sky Shrines
Zelda: Tears of the Kingdom central sky shrines
You can see all the Zelda: Tears of the Kingdom shrines we’ve found so far in the Central Hyrule Sky Archipelago and the South Hyrule Sky Archipelago in the photo above.
Zelda: Tears of the Kingdom Hebra sky shrines
You can see all the Zelda: Tears of the Kingdom shrines we’ve found so far in the Hebra sky archipelagos in the photo above.
Zelda: Tears of the Kingdom Eldin/Lanayru sky shrines
You can see all the Zelda: Tears of the Kingdom shrines we’ve found so far in the Eldin and Lanayru sky archipelagos in the photo above.
Zelda: Tears of the Kingdom Necluda sky shrines
You can see all the Zelda: Tears of the Kingdom shrines we’ve found so far in the Necluda sky archipelagos in the photo above.
Zelda: Tears of the Kingdom shrine guides
Here’s a quick walkthrough for some of the toughest Zelda Tears of the Kingdom shrines so you’re not stuck banging your head against a brick wall for hours.
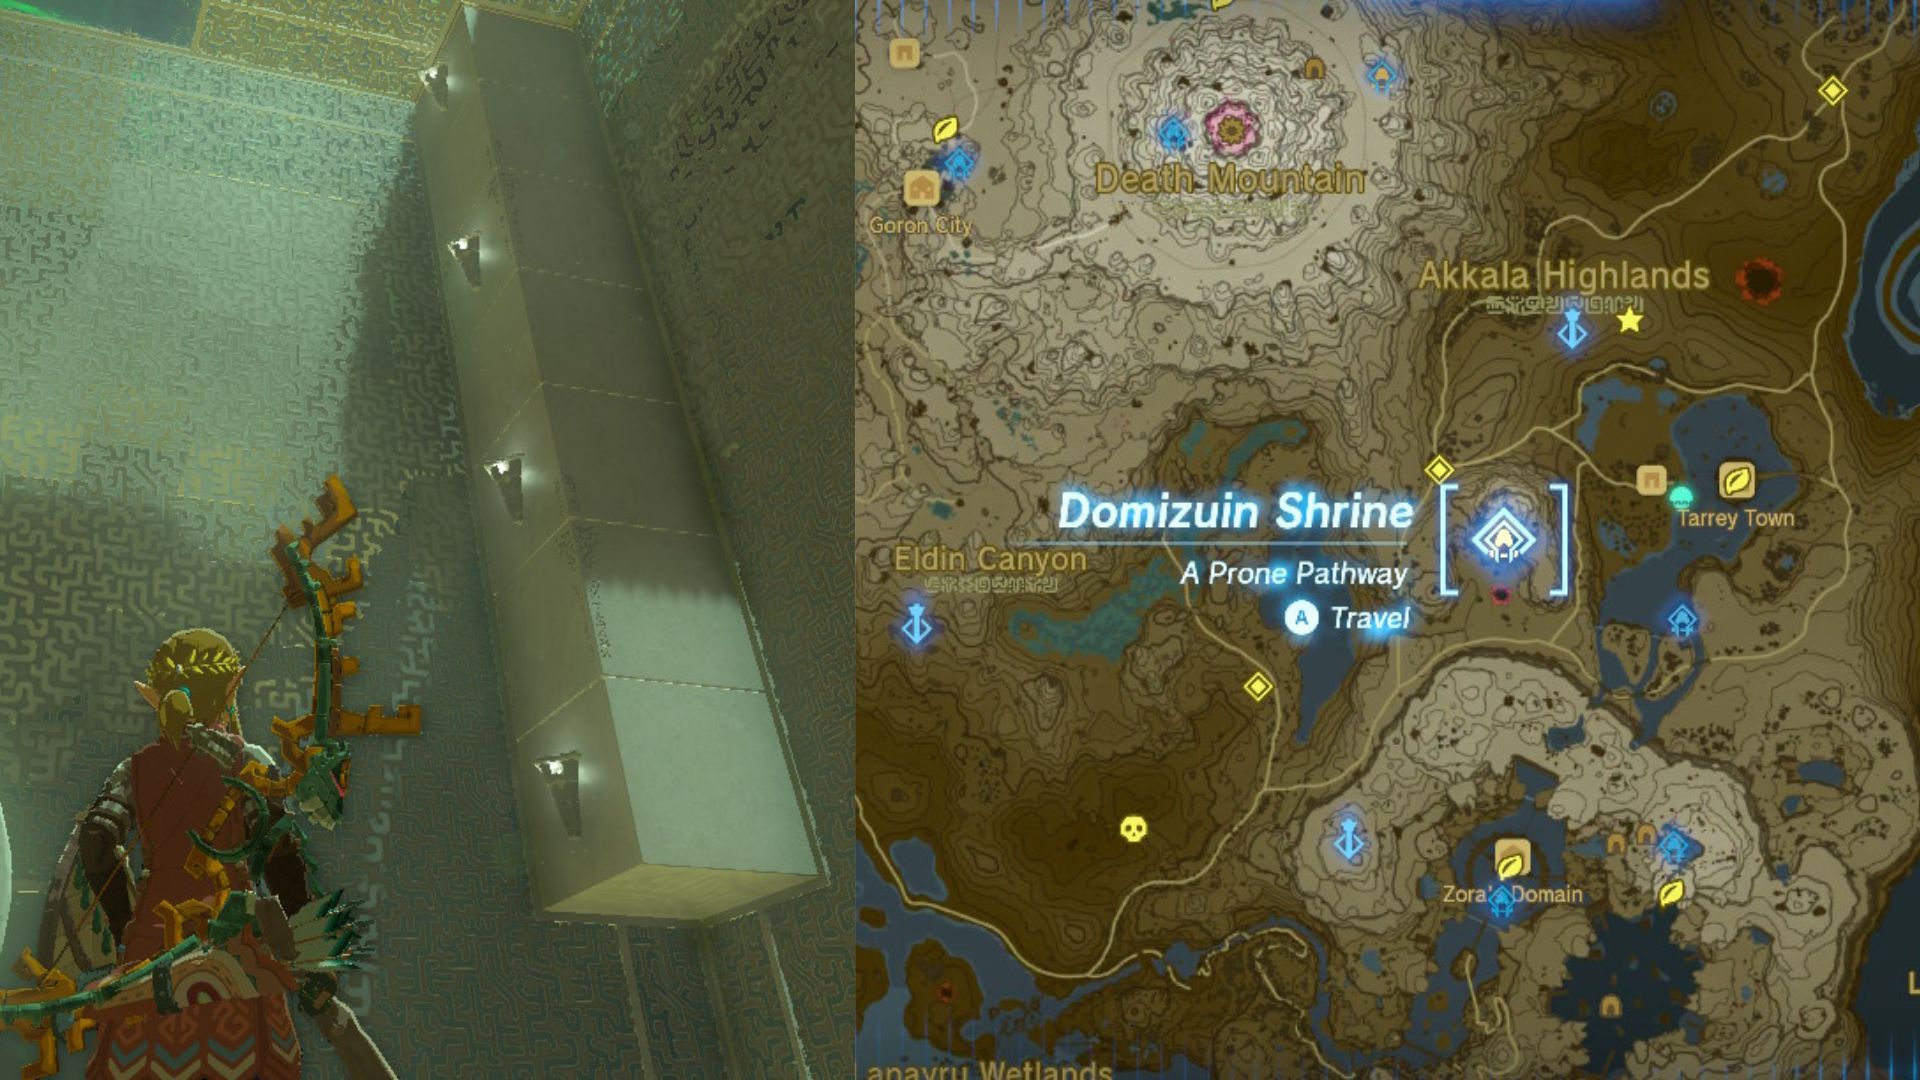
Zelda: Tears of the Kingdom Domizuin shrine walkthrough
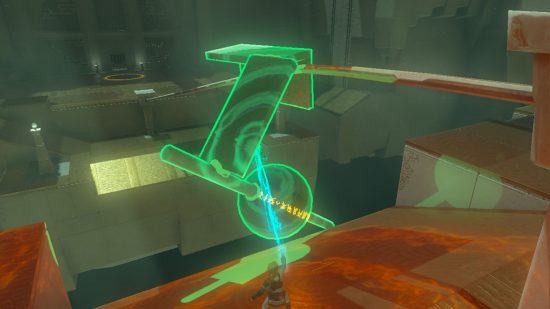
The TotK Domizuin shrine is far easier than it first appears. Ascend through the pillar you see as soon as you enter, hit the crystal ahead of you to get into the giant cube, then look for the grey pillar shown in the picture above. You want to get this pillar angled like it is in the picture by using the second crystal – the one in the centre of the cube – and Ascending through it to the top. You can then just jump carefully to the exit or shoot the first crystal outside the cube for a safer route.
To get the chests inside, hit the second crystal until the short floating platform is the right way up, then ascend through it. You can spin the other chest so it’s flat on its side on the ground, hop onto its platform, and shoot at the crystal to rotate it the right way up and open it. The third chest is outside, so, from inside the cube, shoot at the crystal near the entrance to spin the cube and get access to this final chest.
Zelda: Tears of the Kingdom Orochium shrine walkthrough
At the beginning of TotK’s Orochium shrine, don’t go toward the lasers. Instead, walk along the left side, fight the construct, and ascend through the overhang attached to the massive structure. Once on top, you can take down the enemies below with a bow or glide down. If you ignore the stairs and go around the corner, you find another construct and a chest with a bundle of arrows in it. Nice.
Open the doors at the top of the stairs and head into the room. You can either break the laser and fall down or sneak past. The former route leads you to a room with a chest in it – grab the key inside then ascend upwards. That takes you to where the sneaker would end up – take down the enemies, open the locked glowing door, and grab the orb.
Carry the orb around to the back of the room (opposite end to the metal doors) and hop on one of the moving platforms. Once up there, put the orb in the glowing dip to get a glider. Pull the glider out, attach the orb to it, and set it up to fly down the ramp with rails indented into it. Jump on board with it if you want, and fly back to the beginning of the shrine. Detach the orb, put it in the hole, and hey presto! You’ve solved the shrine.
Zelda Tears of the Kingdom Runakit shrine walkthrough
TotK’s Runakit has all the elements of fun, rickety craftsmanship that permeates through all the game. You can see its location above. Once you enter, you see two ladders opposite you. Fly towards them and climb up. Grab the glowing orb with Ultrahand, stick it on the rails to the right, and watch it roll.
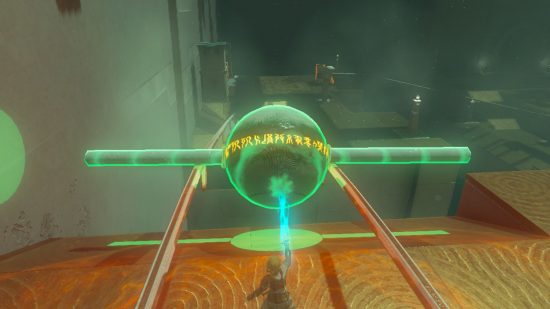
Next, it’s the same again, except the rails are wider, so you need to build some skates. There are different ways to do this, but you can see in the photo above what I chose – this works perfectly. Just glue it all together with Ultrahand and watch it roll.
Last round now. This time around, there’s only one rail. You can basically do whatever here – just use your imagination. If you can’t work it out, you can copy my horrible creation in the photo up above. It ain’t pretty but it works. From there, just plop the ball in the hole and you’re sorted. Head in through the door to grab your reward.
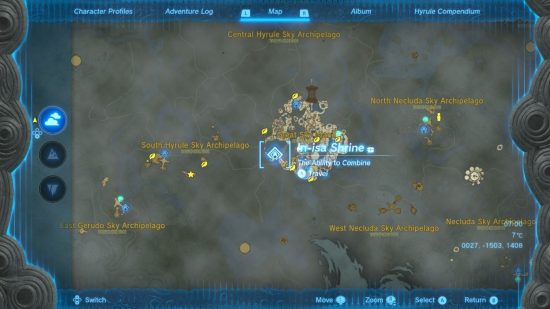
Zelda: Tears of the Kingdom In-isa shrine walkthrough
You can see the TotK In-isa shrine location above. This shrine is all about using Zelda: Tears of the Kingdom’s fusion ability. First up, fuse a boulder to any spare weapon in your inventory to create something to knock down the stone wall straight ahead. Luckily, there are lots of boulders to choose from. Just pick your favorite.
In the next room, there are two chests. One on the short pillar on your left as you enter – just smash the pillar up with your new boulder weapon to get it to fall. The other is to your right. You can grab all the fire fruit in this section and fuse that to an arrow, or just aim your bow and pull it over one of the torches in the corner. Then, shoot it at the leaves up above and the chest platform will burn away, letting the chest fall down for you to open it.
The last room is a combat challenge. Fighting this construct is pretty simple, but you can make it easier by firing a fire-fruit-fused arrow at the leaves on the ground. Then just wail away on this poor robot with your weapon until he’s done. Lastly, smash up the stone wall behind it and head towards the exit. Easy peasy.
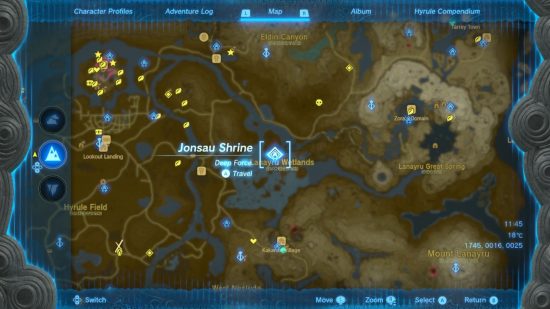
Zelda: Tears of the Kingdom Jonsau shrine walkthrough
Head to the location in the photo above to get to TotK’s Jonsau shrine and head in. This one’s all about buoyant objects, painted yellow. There’s a switch above the water as you enter, and a yellow ball in the water below. Grab it with Ultrahand, push it out so it’s lined up with the switch, and drag it as deep underwater as you can. Let go and it should fly up and hit the switch.
Head onwards, and as you turn the corner in the corridor you come across an enemy. Take it down and head forwards. This time it’s a similar puzzle, but you have a plank instead of a ball. Angle the plank vertically instead of horizontally and do the same as above – line it up, pull it under the water, and let go.
Into the last room then, and things look a little different. They are, but only slightly. Grab the yellow orb, pull it so it’s in line with the wooden plank on the platform above (just to the left of the center), pull it under the water, and let go. This should knock the wooden plank down and bring a platform bouncing down with it.
You can now use the wooden plank as a bridge to the platform by moving it with Ultrahand. Then, jump on the platform that fell down and cast recall on it. The platform will bounce around a bit before launching high enough for you to jump out and into the end of the shrine. Simple!
There are of course loads more Zelda: Tears of the Kingdom shrines for us to find, so be sure to check back regularly. For more, check out our Zelda: Tears of the Kingdom gleeoks, Zelda: Tears of the Kingdom depths, and Zelda: Tears of the Kingdom old map guides.
