
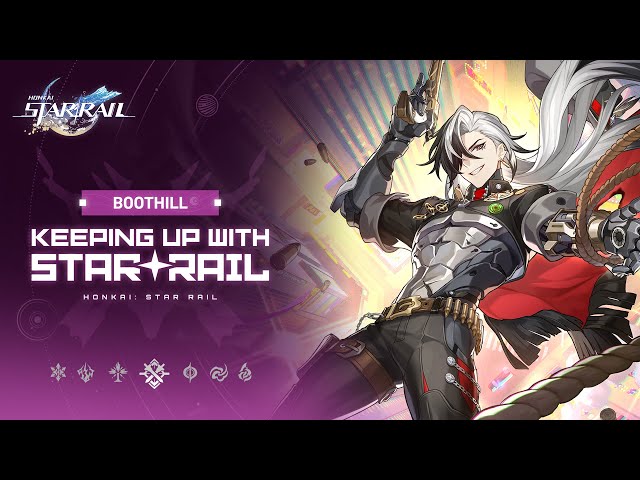
Yeehaw, we’ve got a cool Star Rail character and he’s a cyborg cowboy from space who wears chaps. What’s not to love? Please welcome mother-fudgin’ Honkai Star Rail’s Boothill, and take a look at what we recommend for his best build as a physical DPS including which relics and light cones are best, and what the best Boothill team comp is.
Planning on saving up? Grab the new Honkai Star Rail codes right here. Also, check out our Honkai Star Rail tier list to see where we rank all the characters like Honkai Star Rail’s Jingliu, Honkai Star Rail’s Imbibitor Lunae, and Honkai Star Rail’s Seele.
Here’s everything in our Honkai Star Rail’s Boothill build guide:
What’s the best Honkai Star Rail Boothill build?
| Best light cone | Sailing Towards a Second Life |
| Light cone substitutes | Cruising in the Stellar Sea, Swordplay |
| Best relic set | Iron Cavalry Against the Scourge |
| Planar ornaments | Talia Kingdom of Banditry |
| Main stats | Body – Crit rate/damage Feet – Speed/attack Link rope – Break effect Planar sphere – Physical damage bonus |
| Sub stats | Break effect, attack, crit rate, crit damage |
Boothill is a follower of the Hunt path and uses the physical element. As a Hunt character, he focuses on dealing damage to one target at a time, by locking a single enemy into a duel and dealing hefty damage to them. Boothill is your DPS in any team you put him in.
Boothill’s signature light cone, Sailing Towards a Second Life, is his best in slot and tailored to his kit. We recommend stocking up on attack and break-effect-boosting relics like the Thief of Shooting Meteor set, and a two-piece planar ornament set of Talia Kingdom of Banditry. Remember that during a Standoff, Boothill takes increased damage, so it’s a good idea to keep a healer or a shielder in a team with him.
How do I use Boothill?
Boothill is a DPS, so you use him to deal the most damage, while making use of any buffers at your disposal. By using Boothill’s skill in battle, you lock him into a Standoff with one character, ending when he defeats the target.
What are the best light cones for Boothill?
The best light cone for Boothill is Sailing Towards A Second Life, which is his five-star signature. If you aren’t pulling for that, then there are some other great options that work with his kit.
| Light cone | Effect | How to obtain |
| Sailing Towards A Second Life (five-star) | Increases Boothill’s break effect by 60%. The break damage dealt by him ignores 20% of the target’s defense. When his break effect – in battle – is 150% or higher, his speed increases 12% | Light cone banner (alongside Boothill) |
| Cruising in the Stellar Sea (five-star) | Increases Boothill’s crit rate by 8%, and increases his crit rate against enemies with 50% or less HP by a further 8%. When he defeats an enemy, his attack increases 20% for two turns | Purchase from Herta’s Store |
| Swordplay (four-star) | Each time Boothill hits the same target, his damage dealt increases by 8%. This can stack five times | All banners |
| River Flows in Spring (four-star) | After entering battle, Boothill’s speed increases by 8%, and his damage by 12%. When he takes damage, this effect disappears. The effect resumes on his next turn | All banners |
| Adversarial (three-star) | When Boothill defeats an enemy, he gains a 10% speed increase for two turns. Note that it’s best to use an R5 version of this cone | All banners |
What are the best relics for Boothill?
When finding relics for Boothill, you should focus on attack and break effect as his skills scale off these. We recommend a full set of Iron Cavalry Against the Scourge or Thief of Shooting Meteor, or if you’re struggling to get a good set (don’t worry, we are too), you can go for two two-piece sets of a few different types.
While the Watchmaker and Messenger Traversing Hackerspace two-piece bonuses are great, the four-piece buffs aren’t that helpful on Boothill, so feel free to mix and match.
| Relic | Effect | How to obtain |
| Iron Cavalry Against the Scourge | Two equipped: Increases break effect Four equipped: If Boothill’s break effect is 150% or higher, he ignores 10% of the enemy’s defense when dealing break damage. When his break damage is 250% or higher, the Super Break damage he deals ignores a further 15% of the target’s defense |
Cavern of Corrosion: Path of Cavalier |
| Thief of Shooting Meteor | Two equipped: Increases break effect Four equipped: Increases Boothill’s break effect further. When he inflicts a weakness break on an enemy, he regenerates three energy |
Cavern of Corrosion: Path of Jabbing Punch |
| Champion of Streetwise Boxing | Two equipped: Increases physical damage Four equipped: After Boothill attacks or is hit, his attack stat increases by 5% for the rest of the battle. This effect can stack five times |
Cavern of Corrosion: Path of Jabbing Punch |
| Musketeer of Wild Wheat | Two equipped: Increases attack Four equipped: Increases Boothill’s speed by 6% and his basic attack damage by 10% |
Cavern of Corrosion: Path of Drifting |
| Messenger Traversing Hackerspace | Two equipped: Increases speed Four equipped: Not recommended |
Cavern of Corrosion: Path of Elixir Seekers |
Planar ornament
| Relic | Effect | How to obtain |
| Talia Kingdom of Banditry | Two equipped: Increases Boothill’s break effect. When his speed reaches 145 or higher, his break effect increases by an extra 20% | Immersion Reward devices in World 4 of the Simulated Universe |
| Firmament Frontline Glamoth | Two equipped: Increases Boothill’s attack by 12%. When his speed is equal to or higher than 135/160, he deals 12/18% more damage | Immersion Reward devices in World 8 of the Simulated Universe |
| Rutilant Arena | Two equipped: Increases Boothill’s crit rate by 8%. When his crit rate reaches 70% or higher, his basic attack and skill damage increase by 20% | Immersion Reward devices in World 7 of the Simulated Universe |
Relic stat recommendations
Remember to keep a mother fudgin’ eye on the stats each relic has. When building Boothill, you want to aim for these:
Main stats:
- Body: Crit damage/rate or attack
- Feet: Speed
- Planar sphere: Physical damage boost
- Link rope: Break effect
Sub-stats:
- Attack
- Break effect
- Crit damage/rate
- Speed
")
What are the best Boothill team comps?
Boothill isn’t the most flexible DPS (despite his incredibly high kicks), and his best team is a break-focused comp. Ruan Mei is an excellent buffer for him, as is Bronya, and Pela in a pinch. Though you can use any shielder or healer, Gallagher is the best bet thanks to his weakness break mechanics.
") Boothill Boothill |
 Ruan Mei Ruan Mei |
 Trailblazer (Harmony) |
 Gallagher Gallagher |
| Boothill |
Ruan Mei |
Gallagher |
|
| Boothill |
Ruan Mei |
") Aventurine Aventurine |
What are Boothill’s skills?
Here are the rootin’ tootin’ cowboy’s skills in battle. He can apply physical weakness to enemies, which will definitely help in shooting them down in one fell swoop.
Active skills:
| Skill | Effect |
| Basic attack: Skullcrush Spurs | Boothill deals physical damage equal to 90% of his attack stat to a single enemy |
| Enhanced basic attack: Fanning the Hammer | Deals damage to a single target equal to 198% of his attack stat. This enhanced skill can’t recover skill points, and can only target the enemy in the Standoff with Boothill |
| Skill: Sizzlin’ Tango |
Forces Boothill and a single enemy into the Standoff state, where they can only target each other. In this state, Boothill’s basic attack turns into Fanning the Hammer, and he cannot use his skill for two turns. The enemy target becomes taunted and both Boothill and the enemy take increased damage. If Boothill breaks the weakness of the enemy, he gains a stack of Pocket Trickshot and dispels the Standoff. This skill does not regenerate energy, but after using the skill, Boothill’s turn continues |
| Ultimate: Dust Devil’s Sunset Rodeo | Boothill applies a physical weakness to a single target enemy for two turns and deals physical damage equal to 360% of Boothill’s attack to the target. He also delays their action by 37% |
Talent:
| Skill | Effect |
| Five Peas in a Pod | Each stack of Pocket Tricksot increases Fanning the Hammer’s toughness reduction by 50%, stacking up to three times. If the target has its weakness broken while Boothill uses Fanning the Hammer, he deals break damage based on how many Trickshot stacks he has, equal to 61/105/148% of his physical break damage. The maximum toughness taken into account for this cannot exceed 16 times the base toughness reduction of Skullcrush Spurs |
Technique:
| Technique | Effect |
| 3-9 x Smile | Boothill inflicts physical weakness on an enemy when using his skill for the first time in battle, lasting for two turns |
Traces:
| Trace | Effect |
| Ghost Load | Increases Boothill’s crit rate and crit damage by an amount equal to 10/50% of Boothill’s break effect – this has a maximum limit of 30/150% |
| Above Snakes | While in the Standoff, this skill reduces the damage Boothill receives from targets outside the Standoff by 30% |
| Point Blank | When in a Standoff and gaining Pocket Trickshot, Boothill regenerates ten energy. He can also trigger this when gaining Pocket Trickshot stacks that exceed the maximum limit |
What are Boothill’s eidolons?
| Eidolon | Effect |
| Level one: Dusty Trail’s Lone Star | When a battle starts, Boothill gains one stack of Pocket Trickshot. When Boothill deals damage, he ignores 16% of an enemy’s defense |
| Level two: Milestonemonger | When in a Standoff and gaining stacks of Pocket Trickshot, Boothill recovers one skill point and increases his break effect by 30%. This lasts for two turns. He can also trigger this effect when gaining Pocket Trickshot stacks that exceed the maximum limit |
| Level three: Marble Orchard’s Guard | Increases the level of Boothill’s ultimate, Dust Devil’s Sunset Rodeo, by two – up to a maximum of 15. Also increases the level of Boothill’s basic attack, Skullcrush Spurs, by one – up to a maximum of ten. |
| Level four: Cold Cuts Chef | When Boothill attacks the enemy target in the Standoff, the damage they receive increases by 12%. When Boothill gets attacked by the same enemy, it offsets his increased damage taken by 12% |
| Level five: Stump Speech | Increases Boothill’s skill, Sizzlin’ Tango, by two – up to a maximum level of 15. Also increases his talent, Five Peas in a Pod, by two – also up to a maximum level of 15 |
| Level six: Crowbar Hotel’s Raccoon | When triggering his talents break damage, Boothill additionally deals break damage to the target equal to 40% of the original damage multiplier and deals additional break damage to adjacent targets equal to 70% of the multiplier |
")
What are Boothill’s ascension materials?
Here’s your shopping list of items you need to ascend Boothill. The IPC work permits come from the stagnant shadow boss in Clock Studios Theme Park, and the tatters of thought drops come from Penacony’s enemies.
| Required level | Credits | Materials |
| 20 | 4,000 | Five tatters of thought |
| 30 | 8,000 | Ten tatters of thought |
| 40 | 16,000 | Three IPC work permits, six fragments of impression |
| 50 | 40,000 | Seven IPC work permits, nine fragments of impression |
| 60 | 80,000 | 20 IPC work permits, six shards of desire |
| 70 | 160,000 | 35 IPC work permits, nine shards of desire |
What are Boothill’s trace materials?
You’re going to want to upgrade Boothill’s traces, and here are the materials you need to do it – along with where to find them.
- 41 tatters of thought, 56 fragments of impression, and 58 shards of desire
- Obtain from memory zone meme enemies, the Simulated Universe, purchase from the Embers Exchange store, and the synthesizer
- 15 meteoric bullets, 72 destined expiration, and 139 countertemporal shots
- Obtain from the Bud of the Hunt calyx in the SoulGlad Audition Venue and purchase from the Embers Exchange store
- 12 lost echo of the shared wish
- Obtain from the Salutations of Ashen Dreams weekly boss in the Penacony Grand Theater
- 11 tracks of destiny
- Obtain from events, as rewards in the Simulated Universe, from the Embers exchange, and Nameless Honor (battlepass) rewards
- 3,000,000 credits
Skill trace priority:
- Talent > skill > ultimate > basic attack
For now, why not check out our Honkai Star Rail’s Gallagher and Honkai Star Rail’s Sparkle builds, then redeem the working Genshin Impact codes for some more Hoyo goodness?