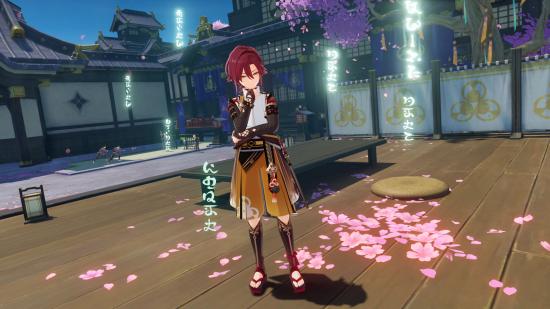
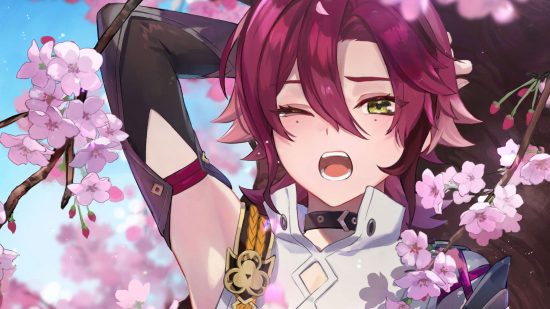
If you’re looking for the best Genshin Impact Heizou build, you’re in the right place. This four-star anemo catalyst user is an awesome ally, whether you’re looking for a quickswap sub-DPS or a reaction driver. Si let’s take a look at his best weapons, artifacts, and more.
If you’re hoping to have the best team to accompany you on your adventure, check out our Genshin Impact character and Genshin Impact next banner guides. We also have a list of Genshin Impact codes to snag you some freebies, and a rundown of all the latest Genshin Impact events to keep you busy whenever you’re taking a break from helping Heizou in his latest investigation.
Here’s everything in our best Genshin Impact Heizou build:
What’s the best Genshin Impact Heizou build?
| Best weapon | Quickswap: Skyward Atlus Reaction driver: Sacrificial Fragments |
| Weapon substitutes | Quickswap:
Reaction driver:
|
| Best artifact set | Viridescent Venerer |
| Artifact substitutes |
|
| Main stats | Quickswap:
Reaction driver:
|
| Sub stats | Quickswap:
Reaction driver:
|
As a melee anemo catalyst wielder, Heizou is a truly unique unit, and surprisingly strong for a four-star. He has great flexibility, allowing him to fill multiple roles. The most common and effective roles for him are quickswap sub-DPS or reaction driver.
For the best Genshin Impact Heizou build, we recommend equipping him with Skyward Atlas in a quickswap team, or Sacrificial Fragments in a reaction driver role. The best artifact set for him is Viridescent Venerer, and you should generally aim for pieces with crit, elemental mastery, and energy recharge.
In a quickswap team, you should prioritize leveling up his elemental skill first, then his burst, then his normal attack. As a reaction driver, you should still prioritize his elemental skill first, but after that you should go for his normal attack, then his burst.
Competition is stiff for Heizou (namely with Genshin Impact’s Kazuha and Genshin Impact’s Sucrose comfortably filling the same role and also offering buffs to their allies) and his grouping isn’t as strong as his other anemo counterparts. However, his unique kit, versatility, and affordable build options make him a highly valuable unit in many teams.
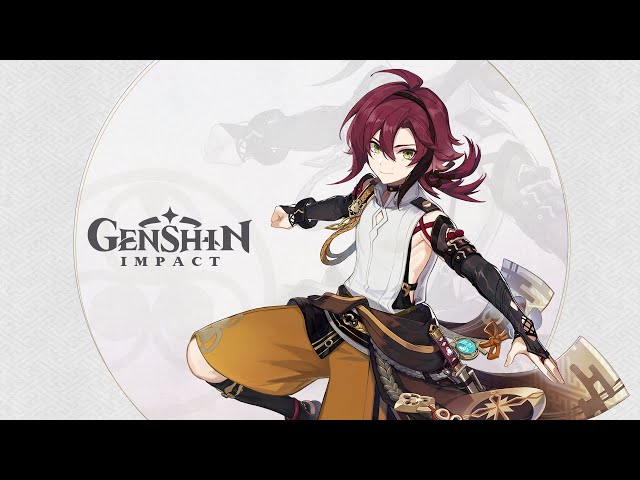
How to use Genshin Impact’s Heizou
As mentioned above, Heizou works best either as a quickswap sub-DPS, where his goal is to apply relevant buffs and deal a significant amount of damage in a short window, or as a reaction driver, where he uses his anemo application to trigger swirls and shred enemy resistance.
If you want to make the most of his kit, when on-field we recommend that you focus on getting Heizou to max Declension stacks as quickly as possible, as they buff his elemental skill. You can gain Declension stacks in two ways – by either holding the elemental skill button to charge it or by triggering a swirl reaction with Heizou.
Holding the skill button to full stacks takes quite a long time, and leaves you vulnerable to enemy attacks. As such, we recommend relying on swirl reactions to gain stacks. You can trigger Heizou’s swirl reactions easily if you pair him up with a teammate who can apply elemental reactions from off-field.
What’s the best weapon for Heizou?
The best weapon for Heizou depends on how you want to use him, though pretty much all options are viable for him in some way.
Quickswap DPS Heizou
If you’re looking for Heizou to be a high-impact quickswap DPS, Skyward Atlas is his best in slot due to its powerful base stat and its passive, which only requires you to hit an enemy with a normal attack.
If you’re running quickswap DPS Heizou with a shielder, Memory of Dust is an extremely strong option. However, its effects become less valuable if you’re teaming up with a buffer like Bennett.
Kagura’s Verity is also a solid choice for quickswap DPS Heizou, though it takes roughly 30 seconds to obtain the three stacks needed to feel its full effect, meaning Heizou deals a little less damage at the start of a fight.
When it comes to four-star options, the Widsith at R5 is your best bet, though its damage fluctuates wildly depending on what buffs he has during his rotation.
Alternatively, Sacrificial Fragments at R3 or higher is a more stable option that allows him to use an extra skill during each rotation. This buff combined with the additional elemental mastery it offers gives you room to build more offensive artifacts, too.
| Weapon | Effect | How to obtain |
| Skyward Atlas | Base stat: attack Skill: increases elemental damage bonus by 12%. Normal attack hits have a 50% chance to earn the favour of the clouds, which actively seek out nearby opponents to attack for 15 seconds, dealing 160% attack damage. This can only occur once every 30 seconds |
Gacha |
| Memory of Dust | Base stat: attack Skill: increases shield strength by 20%. Scoring hits on opponents increases attack by 4% for eight seconds, to a max of five stacks. This can only occur once every 0.3 seconds. While the wielder is protected by a shield, this attack buff increases by 100% |
Gacha |
| Kagura’s Verity | Base stat: crit damage Skill: upon using an elemental skill, the wielder gains the Kagura Dance effect, which increases their elemental skill damage by 12% for 16 seconds. Max three stacks. The equipping character gains a 12% increase to all elemental damage bonuses when they possess three stacks |
Gacha |
| Widsith | Base stat: crit damage Skill: when a character takes to the field, they gain a random song for ten seconds. This can only occur once every 30 seconds. The recitative song increases attack by 60%, the Aria song increases all elemental damage by 48%, and the Interlude song increases elemental mastery by 240 |
Gacha |
| Sacrificial Fragments | Base stat: elemental mastery Skill: when the wielder’s elemental skill deals damage to an opponent, the skill has a 40% chance to end its own cooldown. This can only occur once every 30 seconds |
Gacha |
Reaction driver Heizou
If you prefer your Heizou to focus solely on driving elemental reactions, then any weapon with an EM base stat takes the lead. Specifically, Sacrificial Fragments is the best choice, as it has the highest EM base stat out of all four-star weapons, and allows more swirls which is a big benefit in multi-target battles.
If you don’t have Sacrificial Fragments for your reaction driver Heizou, Magic Guide is a great economical option as it supplies a substantial amount of elemental mastery. Mappa Mare is also a good choice, as, although it offers less elemental mastery overall than Magic Guide, it’s a more flexible choice, allowing you to play a reaction driver DPS hybrid build.
| Weapon | Effect | How to obtain |
| Sacrificial Fragments | Base stat: elemental mastery Skill: when the wielder’s elemental skill deals damage to an opponent, the skill has a 40% chance to end its own cooldown. This can only occur once every 30 seconds |
Gacha |
| Magic Guide | Base stat: elemental mastery Skill: increases damage against opponents affected by hydro or electro by 12% |
Gacha |
| Mappa Mare | Base stat: elemental mastery Skill: when the wielder triggers an elemental reaction, they gain an 8% elemental damage bonus for ten seconds. Max two stacks |
Forge via blacksmith |
What are the best artifacts for Heizou?
Viridescent Venerer is the best artifact set for Heizou. It not only increases his personal damage, but also boosts the rest of his team, and nothing else truly compares.
If you have another full set Viridescent Venerer holder on your Heizou team, you can instead use an easy-to-obtain combo of two pieces of Viridescent Venerer with two pieces of a set that gives you an elemental mastery boost (like Gilded Dreams), or two pieces of a set that gives you an attack boost (like Gladiator’s Finale). This set costs very little damage loss and allows you more freedom regarding stats and sub-stats, but doesn’t compare to the overall team damage boost provided by a full Viridescent Venerer set.
Finally, you can use either four pieces of Lavawalker or four pieces of Thundersoother depending on whether you’re pairing Heizou with pyro or electro characters. This is great for Heizou’s personal damage, but, like the previous alternate set, still doesn’t compare to VV for overall team damage. It also restricts potential team comps unless you’re willing to build multiple sets and switch them out when changing between pyro and electro allies.
| Artifact set | Effect | How to obtain |
| Viridescent Venerer | Two equipped: anemo damage +15% Two equipped: increases swirl damage by 60%, and decreases opponent’s elemental resistance to the element infused in the swirl by 40% for ten seconds |
Valley of Remembrance domain in Windwail Highland |
| Lavawalker | Two equipped: pyro resistance +40% Four equipped: increases damage against enemies affected by pyro by 35% |
Hidden Palace of Zhou Formula domain on Bashui Plain, Wuwang Hill |
| Thundersoother | Two equipped: electro resistance +40% Four equipped: increases damage dealt against enemies affected by electro by 35% |
Midsummer Courtyard domain in Starfell Valley, Starsnatch Cliff |
Artifact stat and sub-stats
As with weapon options, your artifact stat and sub-stat choices should be based on what role you want Heizou to play. Of course, regardless of role, getting sufficient energy recharge is still important.
Generally, if you’re happy with using two skills before his burst, a quickswap DPS Heizou requires roughly 120-130% energy recharge, while reaction driver Heizou requires about 100-120%. These requirements increase by about 50% if you want him to burst after only one skill, though having him at C4 or higher reduces this number.
To get a fully accurate understanding of how much energy recharge your Heizou needs, check out Zakharov’s Energy Recharge Calculator tool.
Quickswap DPS Heizou main stats
- Sands – attack%
- Goblet – anemo damage%
- Circlet – crit rate/crit damage (try to remain a 1:2 crit rate to crit damage ratio overall)
Quickswap DPS Heizou sub-stats
- Energy recharge
- Attack%
- Crit rate/crit damage
- Elemental mastery
Reaction driver Heizou main stats
- Sands – elemental mastery
- Goblet – elemental mastery
- Circlet – elemental mastery
Reaction driver Heizou sub-stats
Keep in mind that farming a full set of elemental mastery artifacts takes a lot of time and investment as they have a relatively low drop rate, though they’re very worth it for elemental driver Heizou. As such, you likely won’t have much room to be fussy with sub-stats. But, if you can, prioritise the following.
- Elemental mastery
- Energy recharge
- Attack%
- Crit rate/crit damage (try to remain a 1:2 crit rate to crit damage ratio overall)
What are the best Heizou team comps?
As we mentioned at the beginning of this guide, Heizou can slip into a lot of elemental reaction teams, but faces some stiff competition, especially due to his lack of buffing and grouping capabilities. However, his high damage ceiling and ability to swirl makes him a strong catalyst and sub-DPS in a variety of comps, including vaporise, reverse vape, freeze, and hyperbloom teams.
Here are some of our favourite Heizou teams. Keep in mind that you can make some substitutions based on your preferences and available characters – for example, you can swap Diluc with Yoimiya or Hu Tao, Childe with Xingqiu, Kuki with Fischl, etc. Click on the character icons in the table to view their own build guides.
What are Heizou’s abilities?
Here are all of Heizou’s skills and talents.
Active skills:
| Skill | Effect |
| Normal attack: Fighting Martial Art | Normal: perform up to five consecutive melee attacks, dealing anemo damage Charged: consume a set amount of stamina to perform a sweeping kick, dealing anemo damage Plunge: plunge towards the ground, damaging all opponents in your path and dealing anemo damage upon impact with the ground |
| Elemental skill: Heartstopper Strike | Tap: wield the swift winds to launch a Heartstopper Strike that deals Anemo damage Hold: charge energy to unleash an even stronger blow. Heizou obtains the Declension effect while charging, which increases the power of Heartstopper Strike. When you release the skill button or the skill’s duration ends, Heizou strikes forward, dealing anemo damage Declension: increases the power of the next Heartstopper Strike. Max four stacks. When you possess four Declension stacks, the Conviction effect activates, causing your next Heartstopper Strike to be even stronger and have a larger AoE |
| Elemental burst: Windmuster Kick | Leap into the air using the Fudou Style Vacuum Slugger and kick your opponent. The Vaccuum Slugger explodes upon hit, creating an Arresting Windtunnel that pulls in nearby objects and opponents, dealing AoE anemo damage. When Fudou Style Vacuum Slugger hits enemies affects by hydro, pyro, cryo, or electro, it afflicts them with Windmuster Iris, which then explodes and dissipates, dealing AoE damage of the corresponding elemental type. Fudou Style Vacuum Slugger can afflict a maximum of four enemies with the Windmuster Iris. Irises or different elemental types cannot afflict a single enemy target at the same time |
Passive skills:
| Skill | Effect |
| Paradoxical Practice | When Heizou activates a swirl reaction while on the field, he gains one declension stack for Heartstopper Strike. You can trigger this effect once every 0.1 seconds |
| Penetrative Reasoning | After Heizou’s Heartstopper Strike hits an opponent, it increases all party member’s elemental mastery by 80 for ten seconds (excluding Heizou himself) |
| Pre-Existing Guilt | Decreases sprinting stamina consumption for your own party members by 20%. You can’t stack this with other passive talents that provide the same effects |
What are Heizou’s constellations?
When you pull more than one copy of Heizou, you can unlock one of his constellations. Here are all six of Heizou’s constellations and the effects they offer.
| Constellation | Effect |
| C1: Named Juvenile Casebook | For five seconds after Heizou takes to the field, his normal attack speed increases by 15%. He also gains one stack of Declension for Heartstopper Strike. You can trigger this effect once every ten seconds |
| C2: Investigative Collection | Enhances the pull effect of the Arresting Windtunnel created by Windmuster Kick and increases its duration to one second |
| C3: Esoteric Puzzle Book | Increases the level of Heartstopper Strike by three. Max upgrade level is 15 |
| C4: Tome of Lies | The first Windmuster Iris explosion in each Windmuster Kick regenerates nine elemental energy for Heizou. Every subsequent explosion in that Windmuster Kick regenerates an additional 1.5 energy for Heizou. One Windmuster Kick can regenerate a total of 13.5 energy for Heizou in this way |
| C5: Secret Archive | Increases the level of Windmuster Kick by three. Maximum upgrade level is 15 |
| C6: Curious Casefiles | Each Declension stack increases the crit rate of the Heartstopper Strike unleashed by 4%. When Heizou possesses Conviction, this Heartstopper Strike’s crit damage increases by 32% |
What are Heizou’s ascension materials?
Here are all the materials you need to fully ascend Heizou. You can learn where to find them all below the table.
| Level | Mora | Materials |
| 20+ | 20k | One Vayuda Turquoise sliver, three onikabuto, three treasure hoarder insignia |
| 40+ | 40k | Three Vayuda Turquoise fragments, ten onikabuto, 15 treasure hoarder insignia, two runic fang |
| 50+ | 60k | Six Vayuda Turquoise fragments, 20 onikabuto, 12 silver raven insignia, four runic fang |
| 60+ | 80k | Three Vayuda Turquoise chunks, 30 onikabuto, 18 silver raven insignia, eight runic fang |
| 70+ | 100k | Six Vayuda Turquoise chunks, 45 onikabuto, 12 golden raven insignia, 12 runic fang |
| 80+ | 120k | Six Vayuda Turquoise gemstones, 60 onikabuto, 24 golden raven insignia, 20 runic fang |
Here’s where to find all of Heizou’s ascension materials:
- Vayuda turquoise – weekly and normal boss drops, commission bonus rewards, crafted through alchemy or the parametric transformer, or purchase from the Mondstadt and Liyue souvenir shops
- Onikabuto – find them in areas of high electro concentration in Inazuma, especially Mikage Furnace and Mt. Yougou
- Treasure hoarder/silver raven/golden raven insignias – drops from Fatui enemies such as skirmishers, pyro agents, and cicin mages
- Runic fang – drops from the ruin serpent normal boss in Liyue’s Chasm
What are Heizou’s talent materials?
You can level Heizou’s normal attack, elemental skill, and elemental burst to level ten. Here are all of the materials you need to level one of his talents to level ten. You can find out where to get each of the materials below the table.
| Level | Mora | Materials |
| Two | 12.5k | Six treasure hoarder insignia, three teachings of transience |
| Three | 17.5k | Three silver raven insignia, two guide to transience |
| Four | 25k | Four silver raven insignia, four guide to transience |
| Five | 30k | Six silver raven insignia, six guide to transience |
| Six | 37.5k | Nine silver raven insignia, nine guide to transience |
| Seven | 120k | Four golden raven insignia, four philosophies of transience, one the meaning of aeons |
| Eight | 260k | Six golden raven insignia, six philosophies of transience, one the meaning of aeons |
| Nine | 450k | Nine golden raven insignia, 12 philosophies of transience, two the meaning of aeons |
| Ten | 700k | 12 golden raven insignia, 16 philosophies of transience, two the meaning of aeons, one crown of insight |
Here’s where to find each of Heizou’s talent materials:
- Treasure hoarder/silver raven/golden raven insignias – drops from Fatui enemies such as skirmishers, pyro agents, and cicin mages
- Transience talent books – from the Violet Court domain in Kannazuka, Inazuma, on Mondays, Thursdays, and Sundays
- The meaning of aeons – drops from the Magatsu Mitake Narukami no Mikoto weekly boss in End of the Oneiric Euthymia, below the Grand Narukami Shrine in Inazuma
- Crown of insight – special rewards from events and offering systems such as the Frostbearing Tree and the Sacred Sakura
Talent priority
When leveling up Heizou’s talents, we recommend prioritizing the following.
Quickswap:
- Elemental skill > elemental burst > normal attack
Reaction driver:
- Elemental skill > normal attack > elemental burst
That’s everything you need to know about Genshin’s Heizou. To unite the rest of the swirl boys, check out our Genshin Kazuha, Genshin Venti, Genshin Xiao, Genshin Scaramouche, and Genshin Traveler guides. We’ve also got a heap of content on Hoyo’s other hits, including our Honkai Star Rail tier list, Honkai Star Rail codes, and Zenless Zone Zero characters guide.
