Genshin Impact offers a great level of freedom when it comes to playstyle, but there’s something that many new players overlook (and long-term players both love and hate), and that’s the significance of the almighty Genshin Impact artifacts. Picking the best artifacts for your favourite characters can make a whole world of difference to how you fare in battle, so let’s take a look at the best Genshin Impact artifacts, how to make the most of their stats, and where to get them from, so you’ll be grooving with the archons in no time.
For more help getting your head in the game, check out our Genshin Impact weapons guide. After that, be sure to check out our Genshin Impact tier list, Genshin Impact next banner, and Genshin Impact event guide. We’ve also got a list of the latest Genshin Impact codes for some tasty freemos, and Genshin Impact memes to give you a giggle.
So let’s dive into our guide to Genshin Impact artifacts.

What are Genshin Impact artifacts?
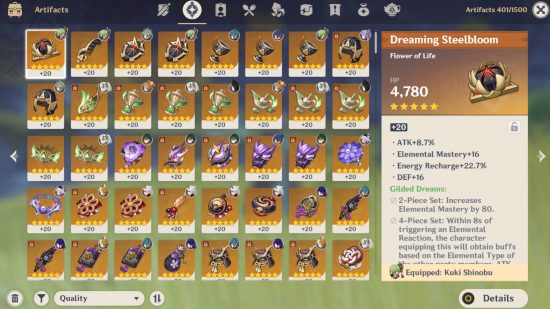
Artifacts are the main way to boost your stats in Genshin Impact, offering a variety of buffs and set bonuses that you must choose carefully to suit the type of character you’re equipping them to. You can equip a maximum of five artifacts on any one character, and many give you benefits for using sets of two or four of the same kind.
There are five different types of artifact. Each piece has a main stat, which you can see below.
| Artifact piece | Potential stats |
| Flower of Life | HP |
| Flume of Death | Attack |
| Sands of Eon | Attack %, defence %, HP %, elemental mastery, or energy recharge |
| Goblet of Eonothem | Attack %, defence %, HP %, or bonus damage |
| Circlet of Logos | Attack %, defence %, HP %, elemental mastery, energy recharge, crit rate, crit damage, healing bonus |
After that, the artifact has a set of substats, determined by RNG. As you enhance the artifact, a random substat will be added or upgraded at certain intervals. Here are the potential substats, each of which can either come as a flat rate or a percentage increase:
- Attack
- HP
- Crit rate
- Crit damage
- Defence
- Energy recharge
- Elemental mastery
Then, there are the set bonuses, unique to each artifact set. It’s up to you how you use these – you can mix and match, using two sets of two to combine the benefits, though for most builds it’s recommended to stick to sets of four, to take advantage of the stronger bonuses. You can see each of the set bonus effects in our list of the best Genshin Impact artifacts.
What are the best Genshin Impact artifacts?
Here’s a list of the best Genshin Impact artifacts you can get in-game at the moment. All of these sets come in either four-star or five-star quality. Five-star is the highest quality, and therefore five-star artifacts often have higher base stats than four-star artifacts, and you can level them up further. However, sometimes the RNG archons aren’t on your side, and you may find that a four-star artifact has better substats for you, so keep that in mind when picking which ones to equip.
Click on the names of the recommended characters for each set to see their full build guides.
Husk of Opulent Dreams
Two pieces equipped: defence +30%
Four pieces equipped: obtain the curiosity effect in the following conditions: when the equipping character is on the field, they gain one stack after hitting an opponent with a geo attack, triggering a maximum of once every 0.3 seconds. When off the field, the character gains one stack every three seconds. Curiosity can stack up to four times, each providing 6% defence and a 6% geo damage bonus. When six seconds pass without gaining a curiosity stack, one stack expires
Obtained from the Slumbering Court domain in Fort Hiraumi, on Seirai Island.
Husk of Opulent Dreams recommended characters:
- Genshin Impact’s Noelle
- Genshin Impact’s Albedo
- Genshin Impact’s Itto
- Genshin Impact’s Gorou
- Genshin Impact’s Yun Jin
Archaic Petra
Two pieces equipped: geo damage +15%
Four pieces equipped: upon obtaining an elemental shard created through a crystallize reaction, all party members gain a 35% damage bonus for that particular element for ten seconds. Characters can only gain one form of elemental damage bonus in this manner at any one time
Obtained from the Domain of Guyun in Sea of Clouds, Guyun Stone Forest.
Archaic Petra recommended characters:
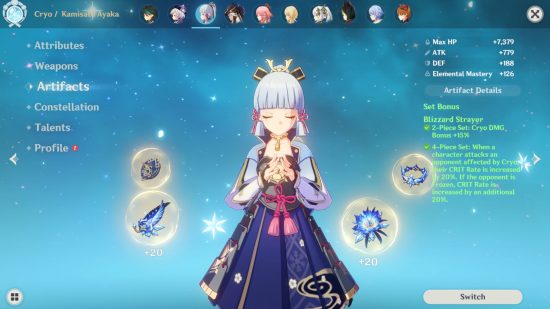
Blizzard Strayer
Two pieces equipped: cryo damage +15%
Four pieces equipped: increases the equipping character’s crit rate by 20% when they attack an enemy affected by cryo. Their crit rate increases by an additional 20% if the enemy is frozen
Obtained from the Peak of Vindagnyr domain on Dragonspine, in Mondstadt.
Blizzard Strayer recommended characters:
- Genshin Impact’s Kaeya
- Genshin Impact’s Ganyu
- Genshin Impact’s Chongyun
- Genshin Impact’s Rosaria
- Genshin Impact’s Ayaka
- Genshin Impact’s Aloy
Bloodstained Chivalry
Two pieces equipped: physical damage +25%
Four pieces equipped: increases the equipping character’s charged attack damage by 50% after they defeat an opponent, and reduces the stamina cost of their charged attack to zero for ten seconds
Obtained from the Clear Pool and Mountain Cavern domain in Minlin, Mt. Aozang, or from the Bloodstained Chivalry Artifact Strongbox.
Bloodstained Chivalry recommended characters:
Crimson Witch of Flames
Two pieces equipped: pyro damage +15%
Four pieces equipped: increases overloaded and burning damage by 40%, and vaporize and melt damage by 15%. Using an elemental skill increases two-piece set effects by 50% for ten seconds. Maximum three stacks
Obtained from the Hidden Palace of Zhou Formula domain on Bashui Plain, Wuwang Hill.
Crimson Witch of Flames recommended characters:
- Genshin Impact’s Xiangling
- Genshin Impact’s Klee
- Genshin Impact’s Diluc
- Genshin Impact’s Bennett
- Genshin Impact’s Hu Tao
- Genshin Impact’s Yanfei
- Genshin Impact’s Yoimiya
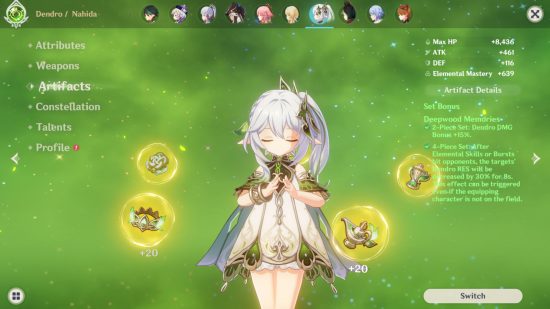
Deepwood Memories
Two pieces equipped: dendro damage bonus +15%
Four pieces equipped: after elemental skills or bursts hit opponents, the targets’ dendro resistance decreases by 30% for eight seconds. This effect can trigger even when the equipping character isn’t on the field (team-wide buff, doesn’t stack if more than one member of you party equips it)
Obtained from the Spire of Solitary Enlightenment domain in Avidya Forest, Sumeru.
Deepwood Memories recommended characters:
- Genshin Impact’s Tighnari
- Genshin Impact’s Collei
- Genshin Impact’s Traveler (dendro)
- Genshin Impact’s Nahida
- Genshin Impact’s Yaoyao
Desert Pavilion Chronicle
Two pieces equipped: anemo damage bonus +15%
Four pieces equipped: when charged attacks hit opponents, the equipping character’s normal attack speed increases by 10% while their normal, charged, and plunging attack damage increases by 40% for 15 seconds
Obtained from the City of Gold domain in Eye of the Sands, Great Red Sand, Sumeru.
Desert Pavilion Chronicle recommended characters:
Echoes of an Offering
Two pieces equipped: attack +18%
Four pieces equipped: when normal attacks hit opponents, there’s a 36% chance for them to trigger Valley Rite, which increases normal attack damage by 70% of attack. This effect dispels 0.05 seconds after a normal attack deals damage. If a normal attack fails to trigger Valley Rite, the odds of the next normal attack triggering it increases by 20%. You can trigger Valley Rite once every 0.2 seconds
Obtained from The Lost Valley domain in Fuao Vale, The Chasm.
Echoes of an Offering recommended characters:
- Genshin Impact’s Ayato (as long as you consistently have under 100 ping /ms)
- Genshin Impact’s Yoimiya
- Genshin Impact’s Childe
- Genshin Impact’s Razor
Emblem of Severed Fate
Two pieces equipped: energy recharge +20%
Four pieces equipped: increases elemental burst damage by 25% of energy recharge. You can obtain a maximum of 75% bonus damage in this way
Obtained from Momiji-Dyed Court domain on Yashiori Island in Inazuma.
Emblem of Severed Fate recommended characters:
- Genshin Impact’s Xiangling
- Genshin Impact’s Amber
- Genshin Impact’s Thoma
- Genshin Impact’s Traveler (electro)
- Genshin Impact’s Raiden Shogun
- Genshin Impact’s Xingqiu
- Genshin Impact’s Gorou
Flower of Paradise Lost
Two pieces equipped: elemental mastery +80
Four pieces equipped: the equipping characters’ bloom, hyperbloom, and burgeon reaction damage increases by 40%. When the equipping character triggers bloom, hyperbloom, or burgeon, they gain an additional 25% reaction damage. Each stack lasts for ten seconds. Max four stacks. This effect can trigger once per second, even when the equipping character isn’t on the field
Obtained from the City of Gold domain in Eye of the Sands, Great Red Sand, Sumeru.
Flower of Paradise Lost recommended characters:
- Genshin Impact’s Kuki Shinobu
- Genshin Impact’s Yae Miko
- Genshin Impact’s Raiden
- Genshin Impact’s Nahida
- Genshin Impact’s Thoma
Gilded Dreams
Two pieces equipped: elemental mastery +80
Four pieces equipped: within eight seconds of triggering an elemental reaction, the equipping character obtains buffs based on the elemental type of the other party members. Increases attack by 14% for each party member with the same elemental type as the equipping character, and increases elemental mastery by 50 for every party member with a different elemental type. Each of the aforementioned buffs count up to three characters. This effect can trigger once every eight seconds, even when the equipping character isn’t on the field
Obtained from the Spire of Solitary Enlightenment domain in Avidya Forest, Sumeru.
Gilded Dreams recommended characters:
- Genshin Impact’s Alhaitham
- Genshin Impact’s Kuki Shinobu
- Genshin Impact’s Cyno
- Genshin Impact’s Thoma
- Genshin Impact’s Yae Miko
- Genshin Impact’s Fischl
- Genshin Impact’s Nahida
- Genshin Impact’s Yaoyao
Gladiator’s Finale
Two pieces equipped: attack +18%
Four pieces equipped: increases the normal attack damage of the wielder by 35% if they use a sword, claymore, or polearm
Obtained from world and weekly bosses, Gladiator’s Finale artifact strongboxes, and Adventure rank up and journal rewards.
Gladiator’s Finale recommended characters:
- Genshin Impact’s Diluc
- Genshin Impact’s Razor
- Genshin Impact’s Keqing
- Genshin Impact’s Fischl
- Genshin Impact’s Beidou
- Genshin Impact’s Chongyun
- Genshin Impact’s Ayaka
- Genshin Impact’s Aloy
- Genshin Impact’s Shenhe
- Genshin Impact’s Xiao
- Genshin Impact’s Jean
- Genshin Impact’s Noelle
Golden Troupe
Two pieces equipped: elemental skill damage increases by 20%
Four pieces equipped: increases elemental skill damage by 25%, and additionally, when the equipping character is not on the field, the elemental skill damage increases by a further 25%. This clears two seconds after taking the field.
Obtained from the Denouement of Sin domain in Fontaine’s Belleau region.
Golden Troupe recommended characters:
Heart of Depth
Two pieces equipped: hydro damage +15%
Four pieces equipped: increases normal and charged attack damage after using an elemental skill by 30% for 15 seconds.
Obtained from the Peak of Vindagnyr domain on Dragonspine, in Mondstadt.
Heart of Depth recommended characters:
Lavawalker
Two pieces equipped: pyro resistance +40%
Four pieces equipped: increases damage against enemies affected by pyro by 35%
Obtained from the Hidden Palace of Zhou Formula domain on Bashui Plain, Wuwang Hill.
Lavawalker recommended characters:
Maiden Beloved
Two pieces equipped: character healing effectiveness +15%
Four pieces equipped: increases healing received by all party members by 20% for ten seconds after you use an elemental skill or burst
Obtained from Valley of Remembrance in Windwail Highland, near the Dawn Winery. You also receive some pieces from adventure rank and journal rewards.
Maiden Beloved recommended characters:
Marechaussee Hunter
Two pieces equipped: Normal and charged attack damage increases by 15%
Four pieces equipped: When the equipping characters’ current HP increases or decreases, their crit rate increases by 12% for five seconds.
Obtained from the Denouement of Sin domain in the Belleau region of Fontaine.
Marechaussee Hunter recommended characters:
Noblesse Oblige
Two pieces equipped: elemental burst damage +20%
Four pieces equipped: increases all party members’ attack by 20% for 12 seconds after using an elemental burst. This effect cannot stack
Obtained from the Clear Pool and Mountain Cavern domain in Minlin, Mt. Aozang, or from the Noblesse Oblige Artifact Strongbox.
Noblesse Oblige recommended characters:
- Genshin Impact’s Xinyan
- Genshin Impact’s Bennett
- Genshin Impact’s Amber
- Genshin Impact’s Lisa
- Genshin Impact’s Traveler (electro, anemo, geo)
- Genshin Impact’s Raiden Shogun
- Genshin Impact’s Sara
- Genshin Impact’s Kaeya
- Genshin Impact’s Diona
- Genshin Impact’s Rosaria
- Genshin Impact’s Venti
- Genshin Impact’s Kazuha
- Genshin Impact’s Xingqiu
- Genshin Impact’s Childe
- Genshin Impact’s Mona
- Genshin Impact’s Ningguang
Nymph’s Dream
Two pieces equippied: hydro damage bonus +15%
Four equipped: when the equipping character’s normal attacks, charged attacks, plunging attacks, elemental skill, or elemental burst hit opponents, they gain one stack of Mirrored Nymph, which lasts for eight seconds. When under the effect of one, two, three, or more Mirrored Nymph stacks, the character’s attack increases by 7%/16%/25%, and their hydro damage bonus increases by 4%/9%/15%. Mirrored Nymph stacks generated by different types of attacks exist independently
Obtained from the Molten Iron Fortress Domain in the Girdle of the Sands, Sumeru.
Nymph’s Dream recommended characters:
We’ve not had the chance to try Nymph’s Dream out just yet, but it looks like a great fit for hydro DPS and sub-DPS like Genshin Impact’s Ayato, Genshin Impact’s Childe, Genshin Impact’s Nilou, and Genshin Impact’s Yelan. We’ll be sure to update this section as soon as we know more.
Pale Flame
Two pieces equipped: physical damage +25%
Four pieces equipped: increases attack by 9% for seven seconds when an elemental skill hits an opponent. This effect stacks up to two times, and you can trigger it once every 0.3 seconds. Once two stacks are reached, the two-set effect is doubled
Obtained from Ridge Watch domain on Bishui Plain, Liyue.
Pale Flame recommended characters:
Retracing Bolide
Two pieces equipped: shield strength +35%
Four pieces equipped: while protected by a shield, gain an additional 40% normal and charged attack damage
Obtained from Domain of Guyun in Sea of Clouds, Guyun Stone Forest.
Retracing Bolide recommended characters:
Shimenawa’s Reminiscence
Two pieces equipped: attack +18%
Four pieces equipped: when using an elemental skill with 15 or more energy, you lose 15 energy and gain 50% normal/charge/plunging attack damage for ten seconds. This effect won’t trigger again during that duration
Obtained from Momiji-Dyed Court domain on Yashiori Island in Inazuma.
Shimenawa’s Reminiscence recommended characters:
Tenacity of the Milelith
Two pieces equipped: HP +20%
Four pieces equipped: upon hitting an enemy with an elemental skill, all nearby party members gain 20% attack and 30% shield strength for three seconds. You can trigger this effect once every 0.5 seconds, even if the character equipped with the artifact is not on the field
Obtained from Ridge Watch domain on Bishui Plain, Liyue.
Tenacity of the Milelith recommended characters:
Ocean-hued Clam
Two pieces equipped: healing bonus +15%
Four pieces equipped: upon healing a party member, a foam appears, accumulating healed HP for three seconds. The foam then explodes and deals 90% of the HP healed as damage to nearby enemies. Max accumulated healing is 30,000 HP, including over-heal. There can only be one foam active at a time, but it remains even if the character leaves the field. Foam cooldown is 3.5 seconds
Obtained from the Slumbering Court domain in Fort Hiraumi, on Seirai Island.
Ocean-Hued Clam recommended characters:
Thundering Fury
Two pieces equipped: electro damage +15%
Four pieces equipped: increases damage caused by overloaded, electro-charged, and superconduct by 40%. Triggering such effects decreases your elemental skill cooldown by one second. Can only occur once every 0.8 seconds
Obtained from the Midsummer Courtyard domain in Starfell Valley, Starsnatch Cliff.
Thundering Fury recommended characters:
- Genshin Impact’s Lisa
- Genshin Impact’s Keqing
- Genshin Impact’s Fischl
- Genshin Impact’s Beidou
- Genshin Impact’s Sara
Thundersoother
Two pieces equipped: electro resistance +40%
Four pieces equipped: increases damage dealt against enemies affected by electro by 35%
Obtained from the Midsummer Courtyard domain in Starfell Valley, Starsnatch Cliff.
Thundersoother recommended characters:
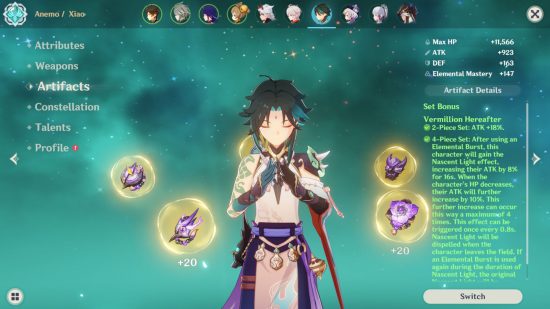
Vermillion Hereafter
Two pieces equipped: attack +18%
Four pieces equipped: after using an elemental burst, the equipping character gains the Nascent Light effect, increasing their attack by 8% for 16 seconds. When their HP drops, their attack further increases by 10%. This effect can trigger a maximum of four times, and can trigger once every 0.8 seconds. Nascent Light dispels when the character leaves the field. If the character uses an elemental burst again during the duration of Nascent Light, the original Nascent Light dispels
Obtained from The Lost Valley domain in Fuao Vale, The Chasm.
Vermillion Hereafter recommended characters:
Viridescent Venerer
Two pieces equipped: anemo damage +15%
Two pieces equipped: increases swirl damage by 60%, and decreases opponent’s elemental resistance to the element infused in the swirl by 40% for ten seconds
Obtained from Valley of Remembrance in Windwail Highland, near the Dawn Winery.
Viridescent Venerer recommended characters:
- Genshin Impact’s Venti
- Genshin Impact’s Traveler (anemo)
- Genshin Impact’s Sucrose
- Genshin Impact’s Xiao
- Genshin Impact’s Jean
- Genshin Impact’s Kazuha
- Genshin Impact’s Sayu
Vourukasha’s Glow
Two pieces equipped: HP +20%
Four pieces equipped: increases elemental skill and elemental burst damage by 10%. When the equipping character takes damage, the aforementioned damage bonus increases by 80% for five seconds. This effect can reach a maximum of five stacks, with the duration of each stack counted independently. The effects can trigger even if the equipping character isn’t on the field
Obtained from the Molten Iron Fortress Domain in the Girdle of the Sands, Sumeru.
Vourukasha’s Glow recommended characters:
We’ve not had the chance to explore this set just yet, but we’ll be sure to update this section with our recommendations soon.
Wanderer’s Troupe
Two pieces equipped: elemental mastery +80
Four pieces equipped: increases charged attack damage by 35% if the equipping character uses a catalyst or a bow.
Obtained from world bosses and weekly bosses, as well as the Wanderer’s Troupe artifact strongbox.
Wanderer’s Troupe recommended characters:
Max four-star Genshin Impact artifacts
These are artifacts that you can find easily on your travels, often through opening chests or defeating enemies. They can come in three-star or four-star quality. While not as strong as the sets listed above, they can act as good alternate artifacts until you get your hands on the sets you want.
| Artifact | Set effect |
| Berserker |
Two pieces equipped: crit rate +12% Four pieces equipped: when HP is below 70%, crit rate is increased by an additional 24% |
| Brave Heart |
Two pieces equipped: attack +18% Four pieces equipped: increases damage by 30% against enemies with more than 50% HP |
| Defender’s Will |
Two pieces equipped: defence +30% Four pieces equipped: increases elemental resistance by 30% for each element present among your characters in the party |
| Gambler |
Two pieces equipped: elemental skill damage +20% Four pieces equipped: defeating an enemy has a 100% chance to remove elemental skill cooldown. Can only occur once every 15 seconds |
| Instructor |
Two pieces equipped: elemental mastery +80 Four pieces equipped: increases all party members’ elemental mastery upon triggering an elemental reaction by 120 for eight seconds |
| Prayers for Destiny | One piece equipped: affected by hydro for 40% less time |
| Prayers for Illumination | One piece equipped: affected by pyro for 40% less time |
| Prayers for Wisdom | One piece equipped: affected by electro for 40% less time |
| Prayers to Springtime | One piece equipped: affected by cryo for 40% less time |
| Resolution of the Sojourner |
Two pieces equipped: attack +18% Four pieces equipped: charged attack crit rate +30% |
| Scholar |
Two pieces equipped: energy recharge +20% Four pieces equipped: gaining energy gives three energy to all party members equipped with a bow or a catalyst. Can only occur once every three seconds |
| The Exile |
Two pieces equipped: energy recharge +20% Four pieces equipped: using elemental burst regenerates two energy for all party members (excluding the wearer) every two seconds for six seconds. This effect cannot stack |
| Tiny Miracle |
Two pieces equipped: elemental resistance increased by 20% Four pieces equipped: incoming elemental damage increases corresponding elemental resistance by 30% for ten seconds. Can only occur once every ten seconds |
How do I get Genshin Impact artifacts?
You’ll gather plenty of Genshin Impact artifacts on your travels across Teyvat, whether they’re from opening chests or defeating enemies, but these are usually lower quality pieces. Shrines of Depth, adventure rank rewards, the traveler’s journal, events, crafting artifact strongboxes, and more also provide you with handy random pieces, but if you want a specific set, you’ll need to farm certain domains or bosses until you get the ones you want.
After you’ve snagged a set with the right stats for you, you’ll want to enhance them. This can be done through the character menu, in the same way you level up weapons, but the only materials you can use are other artifacts (along with a hefty sum of mora, of course). So, even all those Lucky Dog pieces that you’ve never found a use for come in handy after a while.
What is a Genshin Impact artifact strongbox?
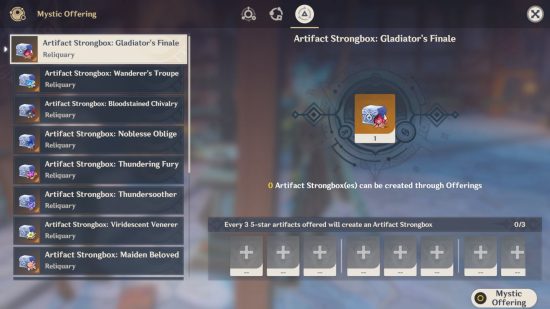
Genshin Impact artifact strongboxes are basically a way of performing a Genshin Impact artifact reroll – allowing you to combine three five star artifacts into a new one. You gain access to this feature when you hit AR 45, which unlocks the Mystic Offering tab on the crafting table. There are four types of artifact strongboxes:
- Gladiator’s Finale
- Wanderer’s Troupe
- Bloodstained Chivalry
- Noblesse Oblige
- Thundering Fury
- Thundersoother
- Viridescent Venerer
- Maiden Beloved
- Archaic Petra
- Retracing Bolide
- Crimson Witch of Flames
- Lavawalker
- Blizzard Strayer
- Heart of Depth
While this mechanic allows you to make use of artifacts with unfavourable substats in hopes of getting something better, it’s a pretty expensive method. The stats and substats of the item created in the artifact strongbox are equally as RNG-based as ones you earn in domains, so there’s no guarantee you’ll get what you want. Therefore, it’s sometimes better to use unwanted five-star artifacts to enhance more useful pieces. However, it’s a good way of trying your luck with new artifacts if you don’t want to spend any more resin.
And that’s it for our Genshin Impact artifacts guide. We’ll be sure to add new artifacts to the list as they come out, so check back from time to time. For now, why not head over to our list of the best mobile games in 2022 to see if you can find something new to play.
